
Cool Space Warp Background Effect with Three.js
In previous tutorial we showed you how to create nebula particles effect using Three.js. This tutorial is still space related. today, we’re going to show you how to create a space warp background effect using JavaScript and Three.js in just a few minutes. Let’s check it out!
Basic Scene Setup
Here is the basic CSS for this page. Just reset the margin and add overflow:hidden to remove the scrollbar.
body {
  width: 100vw;
  height: 100vh;
  margin: 0;
  background: black;
  overflow: hidden;
}
Now let’s import Three.js library to our page and start with the basic setup. we’ll need to create scene, camera and renderer. This tutorial will use perspective camera with 60 degrees FOV and 1000 units viewing frustum. I’ll place the camera and rotate it 90 degrees upward into the sky
<script src="three.min.js"></script>
<script>
    let scene, camera, renderer;

    function init() {
      //create scene object
      scene = new THREE.Scene();

      //setup camera with facing upward
      camera = new THREE.PerspectiveCamera(60,window.innerWidth / window.innerHeight, 1, 1000);
      camera.position.z = 1;
      camera.rotation.x = Math.PI/2;

      //setup renderer
      renderer = new THREE.WebGLRenderer();
      renderer.setSize(window.innerWidth, window.innerHeight);
      document.body.appendChild(renderer.domElement);

      animate();
    }
    //rendering loop
    function animate() {
      renderer.render(scene, camera);
      requestAnimationFrame(animate);
    }
    init();
 </script>
The basic setup is complete, it’s still an empty page but if you open the console you’ll see the Three.js message that indicates everything is running and good to go.
The Star Particles
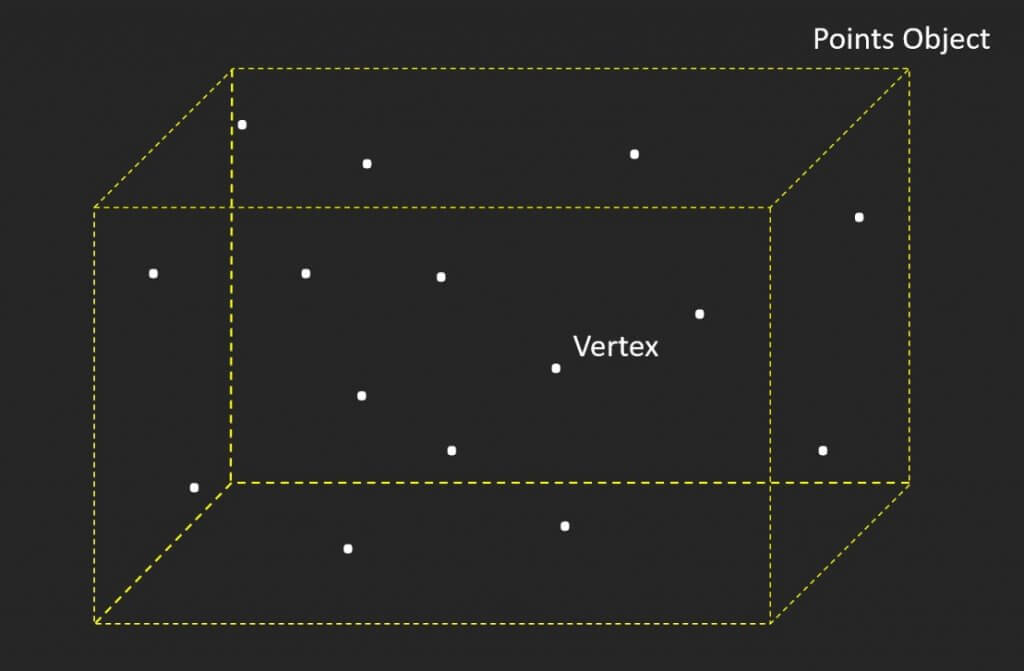
Next we’ll create the stars particles. Since we’re going to need thousands of them, creating a sphere shape for each particle is very expensive and make our website slow. Instead, we’ll create a single 3D object with lots of vertices, then for each of the vertex on that object, we’ll map it with a circle texture. In Three.js we call it “Points Object” which is very useful for dealing with particles.
Now let’s start with creating the geometry. 6000 vertices (stars) should be enough
starGeo = new THREE.Geometry();
for(let i=0;i<6000;i++) {
let star = new THREE.Vector3(
Math.random() * 600 - 300,
Math.random() * 600 - 300,
Math.random() * 600 - 300
);
starGeo.vertices.push(star);
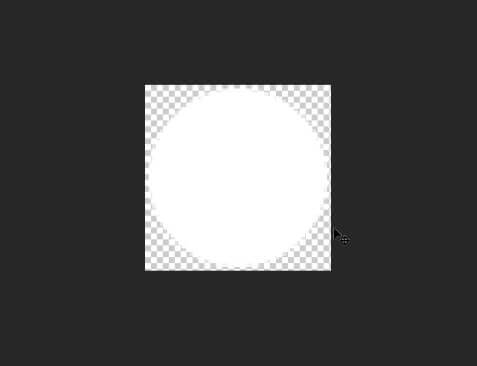
}Next we’ll start mapping texture. You can use any white circle and transparent background like this one.
Then use TextureLoader to load the image. And create a PointsMaterial. Set the color to white, adjust the size and map it with the loaded image.
let sprite = new THREE.TextureLoader().load( 'star.png' );
let starMaterial = new THREE.PointsMaterial({
  color: 0xaaaaaa,
  size: 0.7,
  map: sprite
});
Now both geometry and material are ready. We’ll create a points object and add it to the scene. Did you notice that I didn’t setup any light at all? This because PointsMaterial doesn’t take light into calculation.
stars = new THREE.Points(starGeo,starMaterial);
scene.add(stars);
Looks good. Now let’s animate them.
The Animation
First we’ll set the initial velocity of each star to zero with a small acceleration (Welcome to high school physics)
star.velocity = 0;
star.acceleration = 0.02;
Then on each animation frame, we’ll loop through each vertex and update the velocity and move the star along the y-axis with the velocity amount. If the star falls behind the screen, we’ll reset it’s position and velocity to start over again.
    function animate() {
      starGeo.vertices.forEach(p => {
        p.velocity += p.acceleration
        p.y -= p.velocity;

        if (p.y < -200) {
          p.y = 200;
          p.velocity = 0;
        }
      });
      starGeo.verticesNeedUpdate = true;
..
We’ll need to tell Three.js to update our new vertices position by setting verticesNeedUpdate to true or it will still use the old one.
Also I’ll add a small rotation to the every stars to create a little cinematic effect.
stars.rotation.y +=0.002;
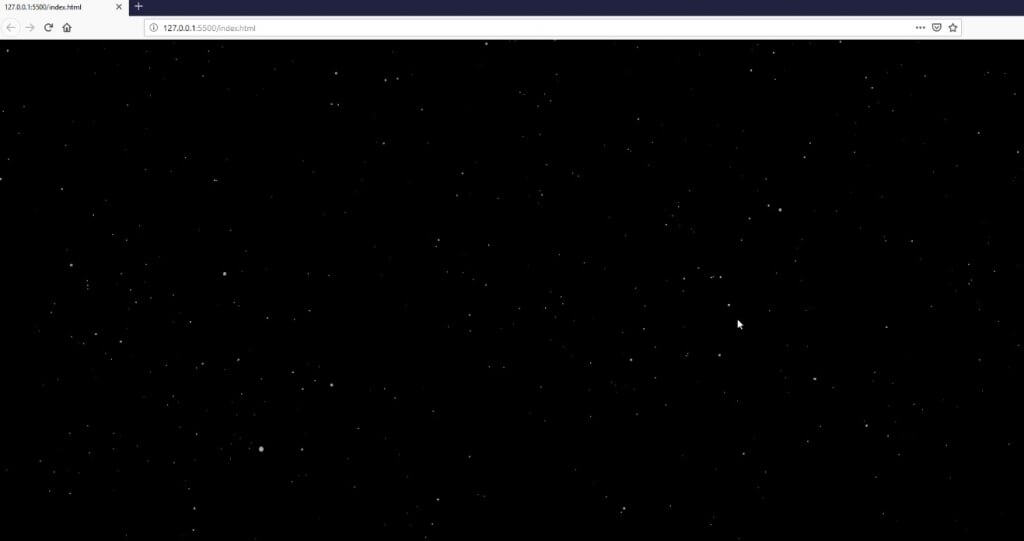
And the effect is ready. After adding some additional code and CSS, now we can have a simple website with our scene as background.
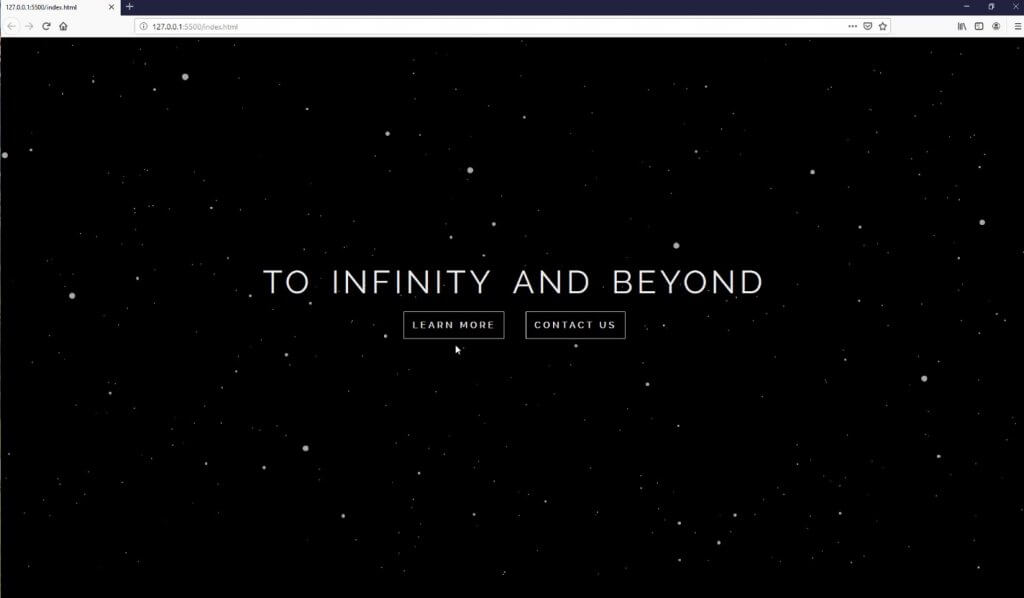
Check the demo from our YouTube Channel below or download the source code to try it yourself.

I have tried it on my own but nothing is showing only a black screen , so is the star.png an image of the star that I should insert my self, and then also the extension for the file I mean the three.min.js how can I do with out it because I am not having it.