Realtime Video Processing with JavaScript (No Library)
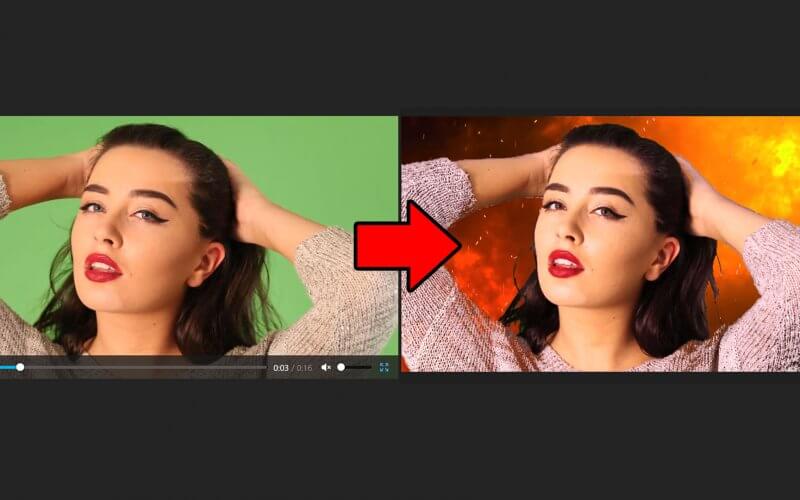
In this tutorial we’re going to show you the basic of real-time video processing using JavaScript. You’ll learn how to remove a green screen background from a video and merge another video as background. Ready? Let’s check it out!
Basic Setup
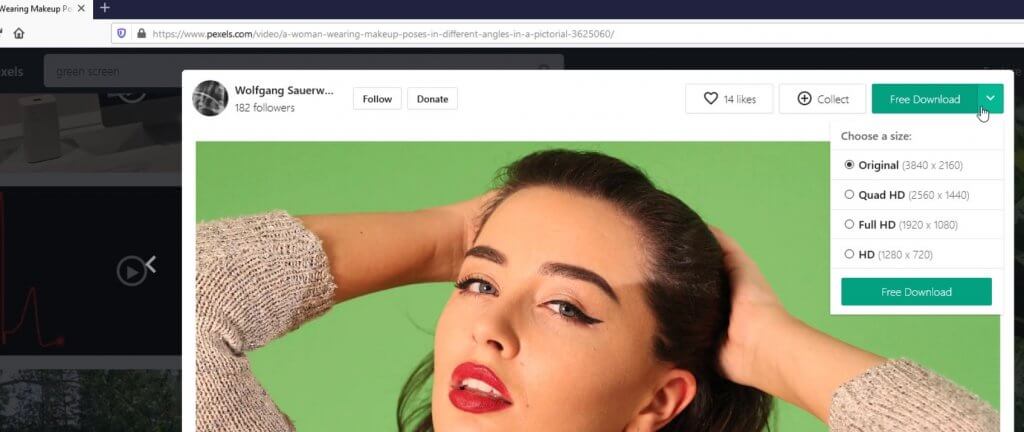
First I’m going to download a video with green screen from pexels.
Then put the video on the our page using video tag. I’ll set the attribute to autoplay muted and loop. As for the output, we’ll use canvas with the same size as video.
<video id="video" width="800" src="video2.mp4" autoplay muted loop></video>
<canvas id="output-canvas" width="800" height="450" ></canvas>
Then I’ll create an initialize function. Let’s start with getting the video and canvas context. (When working with canvas we need to work with its context not the canvas element itself) I’ll also create another canvas as a temporary working space. We’ll use this canvas to extract each video frame and process it before we put it to the output canvas.
At the end initialization, we’ll add event listener to start the processing when the video starts playing.
let video,c1,ctx1,c_tmp,ctx_tmp;
function init() {
  video = document.getElementById('video');

  c1 = document.getElementById('output-canvas');
  ctx1 = c1.getContext('2d');

  c_tmp = document.createElement('canvas');
  c_tmp.setAttribute('width', 800);
  c_tmp.setAttribute('height', 450);
  ctx_tmp = c_tmp.getContext('2d');

  video.addEventListener('play', computeFrame );
}
We’ll put our processing code in another function calls computeFrame. Then use the temporary canvas to get the current video frame as Image using drawImage method and pass our video element and video size. After the video frame has been painted on the temp canvas, we’ll get the image data use getImageData method.
We will skip the processing logic for now and put the imagedata to the output canvas directly. Then use setTimeout to recursively call itself and create a rendering loop.
function computeFrame() {

    ctx_tmp.drawImage(video, 0, 0, video.videoWidth , video.videoHeight );
    let frame = ctx_tmp.getImageData(0, 0, video.videoWidth , video.videoHeight );

    ctx1.putImageData(frame, 0, 0);
    setTimeout(computeFrame, 0);
}
Finally we’ll call the init function when the page content is loaded.
document.addEventListener("DOMContentLoaded", () => {
  init();
});
And our basic setup is finished. You should see the original video playing on the left and the output canvas with the on the right with the same image.

Removing Green Screen Background
Next we’ll going to start removing the green screen background.
The Image data we currently have on the canvas is a in single dimension array format. It starts with the first pixel of the first row, follow by the next pixels in the same row. then start over with the next row repeatedly until we cover the entire image.
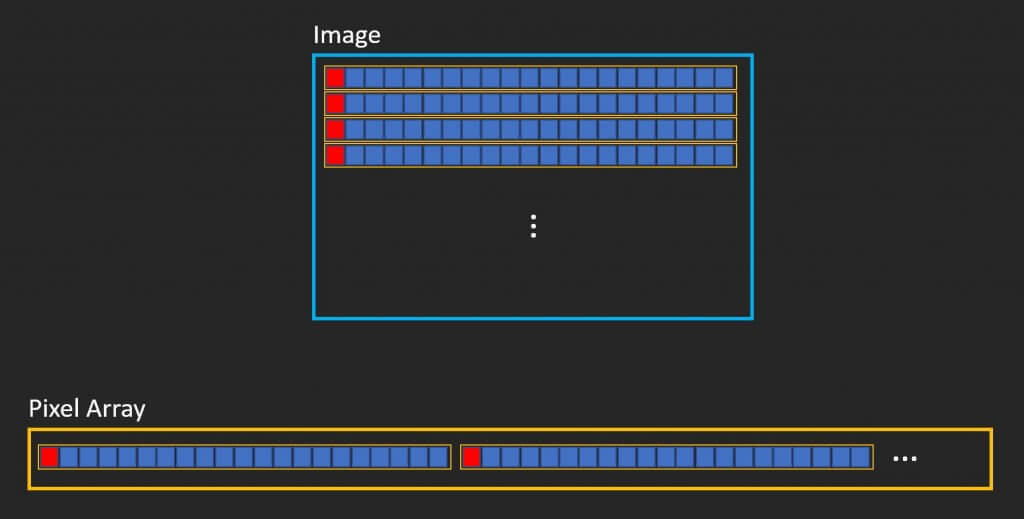
Now each pixel has 4 data. The first three is RGB value and the the last one is alpha or transparency. So each pixel need 4 array spaces and the final array size will be 4 times of the actual number of pixels.
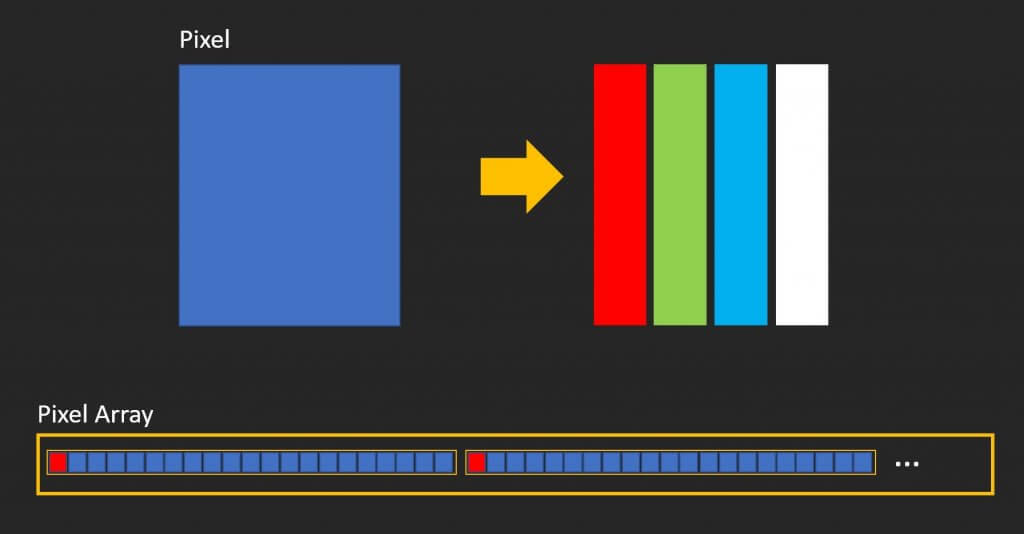
Now to remove the green screen, we’ll need to create loop to check all the pixels RGB value (Notice that I’ve divided the array size by 4) Then we can get the RGB value for each pixel by multiplying the index by 4 and add offset. R is the first value for each pixel hence zero offset. G and B will need 1 and 2 offset respectively.
for (let i = 0; i < frame.data.length /4; i++) {
  let r = frame.data[i * 4 + 0];
  let g = frame.data[i * 4 + 1];
  let b = frame.data[i * 4 + 2];
Then add if statement to check each pixel if its RGB value are close to the green screen color. You can adjust the criteria as you like. Too broad and you’ll remove non background pixel. Too narrow and you’ll still have green background.
Then set the alpha value to zero to remove the green screen.
if (r > 70 && r < 160 && g > 95 && g < 220 && b > 25 && b < 150)
   frame.data[i * 4 + 3] = 0;

Since this is a basic RGB check. You’ll see that there are still green pixels left. We’ll need more advance algorithm to check the color. But for this tutorial, that should be enough.
Merging Videos
Next we’re going to add another video as background. So I’m going to download this fire effect video.
First I’m going to dynamically create a video element for the background video and set the source and other attributes.
video2 = document.createElement('video');
video2.src = "fire.mp4"
video2.muted = true;
video2.autoplay = true;
Then use the temp canvas to extract each frame like we did with the first video. And instead of removing the green screen from the first video, we’ll replace the RGB value with the second video.
    ctx_tmp.drawImage(video2, 0, 0, video2.videoWidth , video2.videoHeight );
    let frame2 = ctx_tmp.getImageData(0, 0, video2.videoWidth , video2.videoHeight );

***

      if (r > 70 && r < 160 && g > 95 && g < 220 && b > 25 && b < 150)
      {
          frame.data[i * 4 + 0] = frame2.data[i * 4 + 0];
          frame.data[i * 4 + 1] = frame2.data[i * 4 + 1];
          frame.data[i * 4 + 2] = frame2.data[i * 4 + 2];
      }
You can download the source code of this tutorial here (code only, you can download videos from pexels)
Or you can see the demo in the video below.
And that’s all for this post. Don’t forget to subscribe our YouTube Channel for more dev tips and tutorials.
