Three.js Realistic Rain Effect Tutorial
In previous post, we made a tutorial how to make Thanos portal effect using Three.js. This time we’ll show you how to use the same technique to turn it into a realistic raining scene in just a few minutes. So, let’s check it out!
Basic Setup
First let’s begin with downloading the latest version of three.js and include it to the page.
<script src="three.min.js"></script>
Next create a scene and then create a camera. I’ll use perspective camera with 60 degrees field of view. Using current viewport aspect ratio and 1,000 unit viewing frustrum. I’ll also set the rotation angle of the camera to look up into the sky.
scene = new THREE.Scene();

camera = new THREE.PerspectiveCamera(60,window.innerWidth / window.innerHeight, 1, 1000);
camera.position.z = 1;
camera.rotation.x = 1.16;
camera.rotation.y = -0.12;
camera.rotation.z = 0.27;
Next I’ll add two types of light here. The first is ambient light. This will illuminate all objects in the scene from all direction. The second is directional light, this will represent the moon light in the sky.
ambient = new THREE.AmbientLight(0x555555);
scene.add(ambient);

directionalLight = new THREE.DirectionalLight(0xffeedd);
directionalLight.position.set(0,0,1);
scene.add(directionalLight);
I’ll setup the WebGLRenderer using the current viewport size. Then add it to the page as canvas element. Also add fog into the scene to create cinematic effect.
renderer = new THREE.WebGLRenderer();
scene.fog = new THREE.FogExp2(0x11111f, 0.002);
renderer.setClearColor(scene.fog.color);
renderer.setSize(window.innerWidth, window.innerHeight);
document.body.appendChild(renderer.domElement);
The basic setup is completed. But there is nothing to see at this time. We’ll start with adding some clouds.
The Clouds
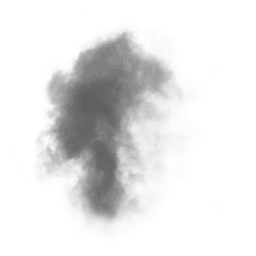
For the cloud I’ll use this smoke image as texture.

Let’s setup the texture loader. In the callback function, we’ll create a geometry for each cloud as 500 unit plain square. Then create a material and map it with the smoke texture. I’m going to create a loop to randomly add each cloud to the scene. I’ll set the cloud rotation angle to face the camera. Also add a little bit of random around the z axis.
let loader = new THREE.TextureLoader();
loader.load("smoke.png", function(texture){

  cloudGeo = new THREE.PlaneBufferGeometry(500,500);
  cloudMaterial = new THREE.MeshLambertMaterial({
    map: texture,
    transparent: true
  });

  for(let p=0; p<25; p++) {
    let cloud = new THREE.Mesh(cloudGeo,cloudMaterial);
    cloud.position.set(
      Math.random()*800 -400,
      500,
      Math.random()*500 - 450
    );
    cloud.rotation.x = 1.16;
    cloud.rotation.y = -0.12;
    cloud.rotation.z = Math.random()*360;
    cloud.material.opacity = 0.6;
    scene.add(cloud);
  }
});
For the cloud animation, First, I’ll keep the reference to each cloud in the array.
cloudParticles.push(cloud);
Then in the animate function, I’ll use the array to rotate them one by one.
function animate() {
      cloudParticles.forEach(p => {
        p.rotation.z -=0.002;
      });
...
}
Next, I’ll add some lightning flash. Let’s setup a pointLight with blue color. I’ll position it behind the cloud and add it to the scene.
flash = new THREE.PointLight(0x062d89, 30, 500 ,1.7);
flash.position.set(200,300,100);
scene.add(flash);
In the animate function, I’ll add a logic to random the flash position and light intensity. You can change the numbers in the if condition to adjust the frequency and intensity.
if(Math.random() > 0.93 || flash.power > 100) {
  if(flash.power < 100)
    flash.position.set(
      Math.random()*400,
      300 + Math.random() *200,
      100
    );
  flash.power = 50 + Math.random() * 500;
}
And here is the result.

The Rain
This will be a little bit different from adding cloud. We’re not creating separated object for each rain drop. That would be very inefficient and you might get a framerate drop. Instead we’ll create just one object which has lots of vertices. And each vertex represents one rain drop.
So I’ll create a loop to create each vertex using vector3 object. We’ll random the position using math.random() and then use vertices.push to add the vertex to the geometry.
rainGeo = new THREE.Geometry();
for(let i=0;i<rainCount;i++) {
  rainDrop = new THREE.Vector3(
    Math.random() * 400 -200,
    Math.random() * 500 - 250,
    Math.random() * 400 - 200
  );
  rainGeo.vertices.push(rainDrop);
}
Then I’ll create a rain material using PointMaterial Class. Set the size and color to white and transparent to true.
rainMaterial = new THREE.PointsMaterial({
  color: 0xaaaaaa,
  size: 0.1,
  transparent: true
});
rain = new THREE.Points(rainGeo,rainMaterial);
scene.add(rain);
Now we’ll animate the rain by adding velocity property to each rain drop.
rainDrop.velocity = {};
rainDrop.velocity = 0;
Then in the animate function, we’ll move each drop and increase the velocity to simulate the gravity. Also reset the position if they’re outside the screen and add a small rotation to the rain object to create a cinematic effect.
rainGeo.vertices.forEach(p => {
  p.velocity -= 0.1 + Math.random() * 0.1;
  p.y += p.velocity;
  if (p.y < -200) {
    p.y = 200;
    p.velocity = 0;
  }
});
rainGeo.verticesNeedUpdate = true;
rain.rotation.y +=0.002;
And that’s it. If you love this tutorial. Please help share this post to support our channel and keep us going. Like our Facebook and subscribe our Youtube Channel to stay tune. Thanks for visiting 🙂
Source Code
HTML/JS
<!DOCTYPE html>
<html>
  <head>
    <meta charset=UTF-8 />
    <link rel="stylesheet" type="text/css" href="styles.css" />
    <title>Three.js Realistic Rain Tutorial by Red Stapler</title>
  </head>
  <body>
    <script src="three.min.js"></script>
    <script>
    let scene,camera, renderer, cloudParticles = [], flash, rain, rainGeo, rainCount = 15000;
    function init() {

      scene = new THREE.Scene();
      camera = new THREE.PerspectiveCamera(60,window.innerWidth / window.innerHeight, 1, 1000);
      camera.position.z = 1;
      camera.rotation.x = 1.16;
      camera.rotation.y = -0.12;
      camera.rotation.z = 0.27;

      ambient = new THREE.AmbientLight(0x555555);
      scene.add(ambient);

      directionalLight = new THREE.DirectionalLight(0xffeedd);
      directionalLight.position.set(0,0,1);
      scene.add(directionalLight);

      flash = new THREE.PointLight(0x062d89, 30, 500 ,1.7);
      flash.position.set(200,300,100);
      scene.add(flash);

      renderer = new THREE.WebGLRenderer();
      scene.fog = new THREE.FogExp2(0x11111f, 0.002);
      renderer.setClearColor(scene.fog.color);
      renderer.setSize(window.innerWidth, window.innerHeight);
      document.body.appendChild(renderer.domElement);

      rainGeo = new THREE.Geometry();
      for(let i=0;i<rainCount;i++) {
        rainDrop = new THREE.Vector3(
          Math.random() * 400 -200,
          Math.random() * 500 - 250,
          Math.random() * 400 - 200
        );
        rainDrop.velocity = {};
        rainDrop.velocity = 0;
        rainGeo.vertices.push(rainDrop);
      }
      rainMaterial = new THREE.PointsMaterial({
        color: 0xaaaaaa,
        size: 0.1,
        transparent: true
      });
      rain = new THREE.Points(rainGeo,rainMaterial);
      scene.add(rain);
      let loader = new THREE.TextureLoader();
      loader.load("smoke.png", function(texture){

        cloudGeo = new THREE.PlaneBufferGeometry(500,500);
        cloudMaterial = new THREE.MeshLambertMaterial({
          map: texture,
          transparent: true
        });

        for(let p=0; p<25; p++) {
          let cloud = new THREE.Mesh(cloudGeo,cloudMaterial);
          cloud.position.set(
            Math.random()*800 -400,
            500,
            Math.random()*500 - 450
          );
          cloud.rotation.x = 1.16;
          cloud.rotation.y = -0.12;
          cloud.rotation.z = Math.random()*360;
          cloud.material.opacity = 0.6;
          cloudParticles.push(cloud);
          scene.add(cloud);
        }
        animate();
      });
    }
    function animate() {
      cloudParticles.forEach(p => {
        p.rotation.z -=0.002;
      });
      rainGeo.vertices.forEach(p => {
        p.velocity -= 0.1 + Math.random() * 0.1;
        p.y += p.velocity;
        if (p.y < -200) {
          p.y = 200;
          p.velocity = 0;
        }
      });
      rainGeo.verticesNeedUpdate = true;
      rain.rotation.y +=0.002;
      if(Math.random() > 0.93 || flash.power > 100) {
        if(flash.power < 100)
          flash.position.set(
            Math.random()*400,
            300 + Math.random() *200,
            100
          );
        flash.power = 50 + Math.random() * 500;
      }
      renderer.render(scene, camera);
      requestAnimationFrame(animate);
    }
    init();
    </script>
  </body>
</html>
CSS
body {
  width: 100vw;
  height: 100vh;
  margin: 0;
  background: black;
  overflow: hidden;
}

