Create 3D World with Three.js and Skybox Technique
In this post, we’re still with Three.js. I’m going to show you how to create an easy 3D world with skybox technique in just a few minutes. Let’s check it out!
What is Skybox
The concept of skybox is really simple. Creating a cube to contain your 3D world and assign the right texture to each side of the cube.
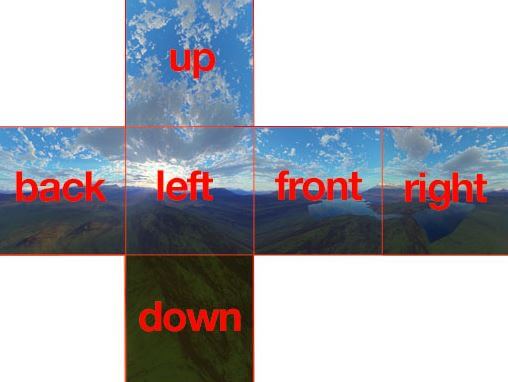
Then place the camera inside the cube.
There are lots available skybox images online both free and paid version. For this tutorial, I’m going to download one from opengameart.org
And then move all the images to the web directory.
Basic Setup
Let’s start with the basic setup for three.js as usual. First include the latest version of the library. Then I’m going to create the scene setup a camera and renderer. Using current viewport as renderer size and add it to the page as canvas.
scene = new THREE.Scene();

camera = new THREE.PerspectiveCamera(55,window.innerWidth/window.innerHeight,45,30000);
camera.position.set(-900,-200,-900);

renderer = new THREE.WebGLRenderer({antialias:true});
renderer.setSize(window.innerWidth,window.innerHeight);
document.body.appendChild(renderer.domElement);
Next I’ll setup an orbitControl.js to enable the mouse control of the camera. If we zoom out too much, it will break the skybox. So we’ll have to limit the zoom distance.
let controls = new THREE.OrbitControls(camera);
controls.addEventListener('change', renderer);
controls.minDistance = 500;
controls.maxDistance = 1500;
The Skybox
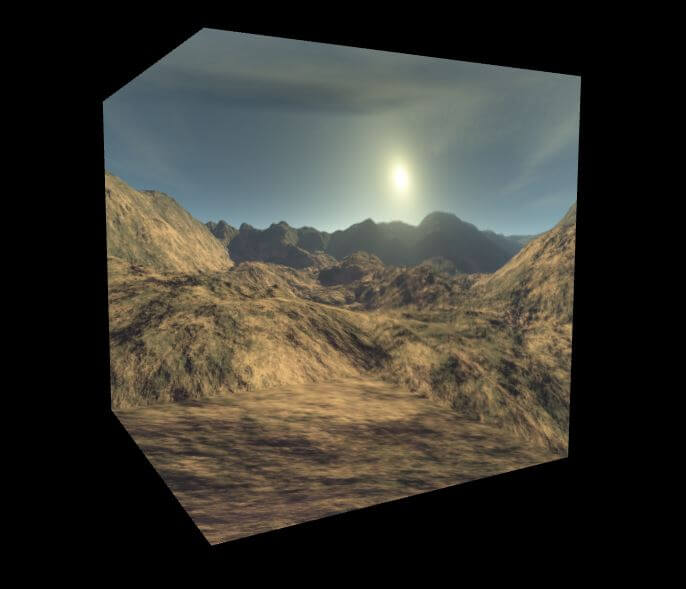
And here is the key part. I’m going to create an array to store materials for each side of the skybox cube. Then use Texture loader to load the image.
Finally, we’ll create a boxGeometry and put it together with the material array to create a cube. Note that we need to set the side property of the material to THREE.backside since we want to apply the texture to the “inside” of the cube.
let materialArray = [];
let texture_ft = new THREE.TextureLoader().load( 'arid2_ft.jpg');
let texture_bk = new THREE.TextureLoader().load( 'arid2_bk.jpg');
let texture_up = new THREE.TextureLoader().load( 'arid2_up.jpg');
let texture_dn = new THREE.TextureLoader().load( 'arid2_dn.jpg');
let texture_rt = new THREE.TextureLoader().load( 'arid2_rt.jpg');
let texture_lf = new THREE.TextureLoader().load( 'arid2_lf.jpg');

materialArray.push(new THREE.MeshBasicMaterial( { map: texture_ft }));
materialArray.push(new THREE.MeshBasicMaterial( { map: texture_bk }));
materialArray.push(new THREE.MeshBasicMaterial( { map: texture_up }));
materialArray.push(new THREE.MeshBasicMaterial( { map: texture_dn }));
materialArray.push(new THREE.MeshBasicMaterial( { map: texture_rt }));
materialArray.push(new THREE.MeshBasicMaterial( { map: texture_lf }));

for (let i = 0; i < 6; i++)
  materialArray[i].side = THREE.BackSide;

let skyboxGeo = new THREE.BoxGeometry( 10000, 10000, 10000);
let skybox = new THREE.Mesh( skyboxGeo, materialArray );
scene.add( skybox );
The result is in this video.
And that’s it! hope you guys enjoy this short tutorial. If you love it, be sure to like our Facebook page and subscribe to our Youtube Channel to stay tune. Thanks for visiting 🙂
Source Code
HTML
<!DOCTYPE html>
<html>
  <head>
    <meta charset=UTF-8 />
    <link rel="stylesheet" type="text/css" href="styles.css" />
  </head>
  <body>
    <script src="three.min.js"></script>
    <script src="OrbitControls.js"></script>
    <script>
      let scene, camera, renderer;

      function init() {
        scene = new THREE.Scene();
        camera = new THREE.PerspectiveCamera(55,window.innerWidth/window.innerHeight,45,30000);
        camera.position.set(-900,-200,-900);

        renderer = new THREE.WebGLRenderer({antialias:true});
        renderer.setSize(window.innerWidth,window.innerHeight);
        document.body.appendChild(renderer.domElement);

        let controls = new THREE.OrbitControls(camera);
        controls.addEventListener('change', renderer);
        controls.minDistance = 500;
        controls.maxDistance = 1500;

        let materialArray = [];
        let texture_ft = new THREE.TextureLoader().load( 'arid2_ft.jpg');
        let texture_bk = new THREE.TextureLoader().load( 'arid2_bk.jpg');
        let texture_up = new THREE.TextureLoader().load( 'arid2_up.jpg');
        let texture_dn = new THREE.TextureLoader().load( 'arid2_dn.jpg');
        let texture_rt = new THREE.TextureLoader().load( 'arid2_rt.jpg');
        let texture_lf = new THREE.TextureLoader().load( 'arid2_lf.jpg');

        materialArray.push(new THREE.MeshBasicMaterial( { map: texture_ft }));
        materialArray.push(new THREE.MeshBasicMaterial( { map: texture_bk }));
        materialArray.push(new THREE.MeshBasicMaterial( { map: texture_up }));
        materialArray.push(new THREE.MeshBasicMaterial( { map: texture_dn }));
        materialArray.push(new THREE.MeshBasicMaterial( { map: texture_rt }));
        materialArray.push(new THREE.MeshBasicMaterial( { map: texture_lf }));

        for (let i = 0; i < 6; i++)
           materialArray[i].side = THREE.BackSide;
        let skyboxGeo = new THREE.BoxGeometry( 10000, 10000, 10000);
        let skybox = new THREE.Mesh( skyboxGeo, materialArray );
        scene.add( skybox );
        animate();
      }
      function animate() {
        renderer.render(scene,camera);
        requestAnimationFrame(animate);
      }
      init();
    </script>
  </body>
</html>
CSS
body {
  width: 100vw;
  height: 100vh;
  margin: 0;
  overflow: hidden;
}

Incredible. Thanks for the tutorial.
Hello,
Why am I having this error?
Uncaught TypeError: THREE.PrespectiveCamera is not a constructor
I got too