[Guide] Vanilla Hackintosh Ultimate Guide for Beginners
***Disclaimer: This vanilla hackintosh guide/tutorial is only for educational purpose. Mainly for anyone who would like to try macOS experience before buying a real mac or get a better understanding of Mac boot process. We do not encourage the violation of Apple’s EULA or any commercial usage of hackintosh ***
What is Vanilla Hackintosh?
There are 2 popular ways to install macOS into non-Apple hardware. First is to use a universal installer to install a “modified” version of macOS (ex. Multibeast/Unibeast, etc.) This is the easiest way to build a hackintosh for beginners since the installer does most of the jobs for you. And another one is “Vanilla” install (like Vanilla JavaScript) which you have to prepare all the required kernel extensions and setup configuration file from scratch. Then place them into a separated EFI partition, leaving macOS main partition intact and identical to a real Mac.
Why Vanilla Method?
Multibeast/Unibeast method modify the macOS by placing all the kernel extensions or “kexts” inside (/system/library/extensions) along with some other modifications. This works well for most of the time but there are some catches.
- Updating macOS could break or remove your hackintosh config
- Since OS partition is tampered, you can’t use it to boot with real Mac or any other vanilla hackintosh
- Limited options to troubleshoot your Mac since everything has been done by the Multibeast. When something’s broken, you are clueless where to start looking.
- Limited options for a unique/unsupported hardware build (ex. Ryzen-Hackintosh)
- You’ll miss the opportunity to learn about boot process, EFI, Clover, how to setup virtual SMC, SMBIOS, etc.
Vanilla hackintosh don’t have this problem because all the kexts and configurations will be placed in EFI (Extensible Firmware Interface) partition which is separate from OS partition. When booting up, these kexts and information will be injected into macOS to make it think it’s running on Apple’s hardware. Thus you’ll get an identical (or almost identical) experience with using a real Mac.
Understanding Hackintosh Boot Process
When you power up a real Mac, a system management controller chip (aka “SMC“) will send information of all your hardware to macOS. This is to ensure the OS that it’s running on a genuine Apple machine and also provide the hardware configuration. Since hackintosh doesn’t have SMC, we’ll need to fake it. And here comes our first and mandatory kexts for all hackintosh – “FakeSMC”
To inject the information and kexts into macOS, we’ll need “Clover” boot manager. First Clover will allow macOS to load its bootloader, then start injecting the “fake” info and kexts. Clover allows you to customize boot arguments, patching firmwares, changing device description/serial numbers, system parameters and several important things. It also give you an option to install multiple OS and boot them selectively. (ex. Installing Windows on drive A, macOS on drive B)
After the bootloader and SMC validation, the OS will start loading drivers. This is when we’ll inject our manually selected kexts files into the OS. If your hackintosh build has Apple supported hardware, you will only need a few kexts. For example, Intel Core series CPU, AMD RX graphic Cards and Broadcom Wifi card are known to natively supported by the macOS and don’t require any extra kexts to work. On the other hand, AMD Ryzen CPU, Nvidia cards and Realtek Wifi cards are much more tricky to setup and require several kexts to work.
The original kexts of macOS are resided in /system/library/extensions of the OS partition. But vanilla method will place all the extra kexts in EFI partition and inject them during the boot instead. This is the main difference between multibeast/unibeast and vanilla method. By leaving the OS partition intact, we’ll be able to use this partition to boot with any Mac or other vanilla hackintosh. Also all the kexts, boot argument and device configuration will be in the same place so you’ll know where to fix them when something goes wrong. And with the right kexts selection and good boot configuration, your hackintosh will work like a real Mac.
Hardware Selection
If you choose to build hackintosh from scratch, you should consider picking hardware that are supported by Apple for maximum compatibility and easier setup. You can look at Mac spec on this everymac.com and copy their build (or at least similar)
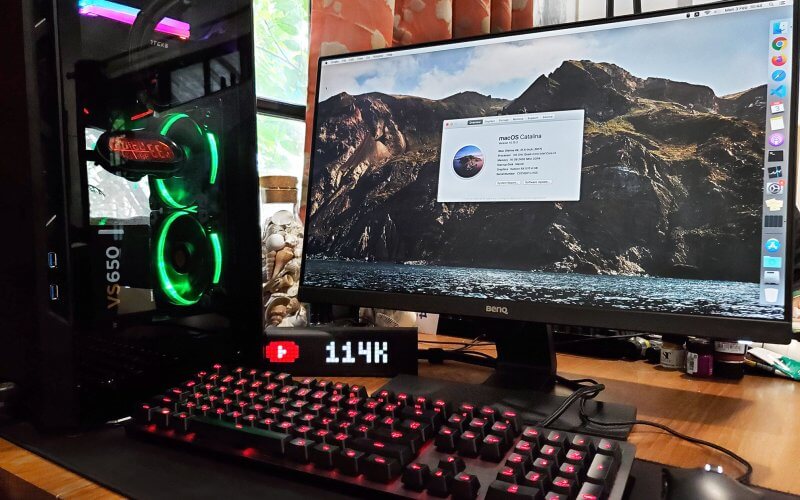
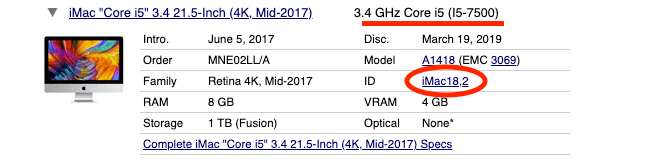
For example, I’m using Intel Core i3-9100F 3.6GHz, MSI RX570 4GB Graphic card and 16GB RAM for my build. This spec is almost identical to iMac 18,2. (i5-7500 and i3-9100F both have 4 cores and close speed)
Below is a brief guide on how to pick your hardware
CPU
Intel Core series is known to work out of the box without extra kexts needed. But if you’re aiming for a budget hackintosh using Pentium, then you’ll need NullCPUPowerManagment.kext and FakeCPUID.kext to spoof CPU ID and fool macOS that it’s running on a Core CPU.
As for Ryzen build, you’ll need extra ACPI patch. This guide is a good start.
Mainboard
It’s a great idea to pick higher end chipset like Z370 for USB-C and USB 3.1 gen2 ports. But the lower end chipset like H370 or even H310 should work perfectly fine.
RAM/Harddisk
You should have at least 8GB RAM and SSD drive for your hackintosh. The more the better. Pick whatever your budget allows.
Graphic Card
This is very important. All Nvidia cards will NOT work with any macOS higher than High Sierra (10.13) So if you want to install Mojave or Catalina, use AMD card or Intel iGPU instead. AMD RX560 and RX570 is a very good budget choice while Vega 64 and RX 5700 XT series are for performance build. There are some AMD card brands you should avoid based on community compliant such as AFOX, XFX, PowerColor and HIS. Also please note that RX550 is not supported.
WiFi
Most of the Broadcom chipset PCIe WiFi card work out of the box. BCM94360 and BCM94352Z are known chipsets that work perfectly with hackintosh. You should choose a WiFi card that has Bluetooth capability in order to make AirDrop works. Intel chipsets don’t work with hackintosh at all and there is no workaround yet. Try to stick with Broadcom and you’ll be fine.
Here is a very cheap Broadcom card that I use with my hackintosh. WiFi and Air Drop works perfectly!
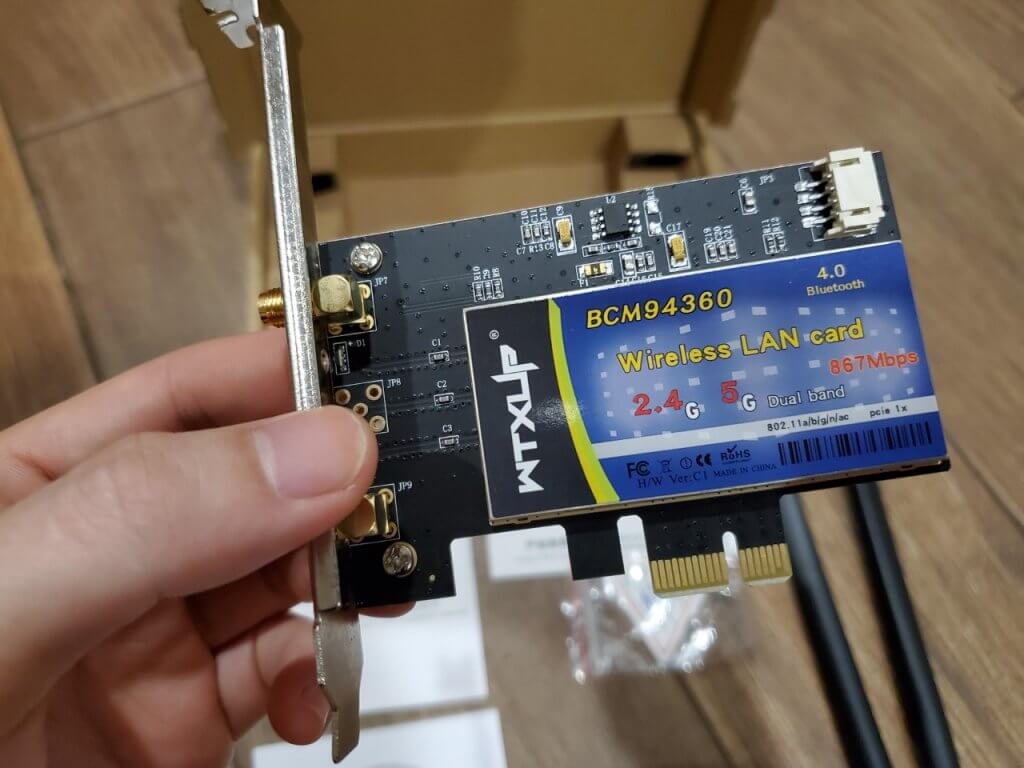
Note: Currently there is no Apple machine that support 802.11ax standard. So we’re stuck with ac card for now.
Hackintosh Build Steps
Create Bootable USB
For this part you’ll need a Mac machine to download the macOS installer and a USB drive with at least 16GB. For those of you who doesn’t have Mac, you can follow this tutorial to setup a Mac virtual machine on Virtualbox.
Now on your mac, download the OS installer from App store. In this tutorial, we’re going to download Catalina 10.15

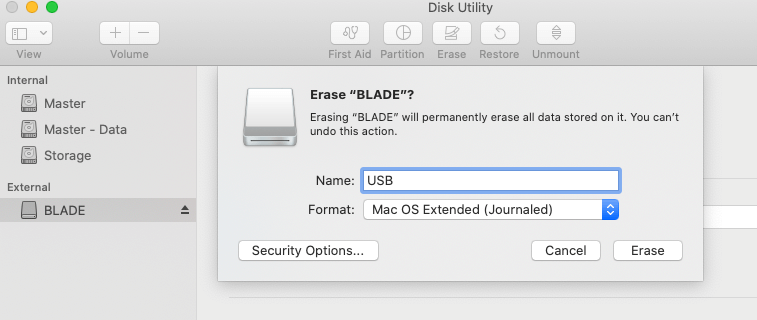
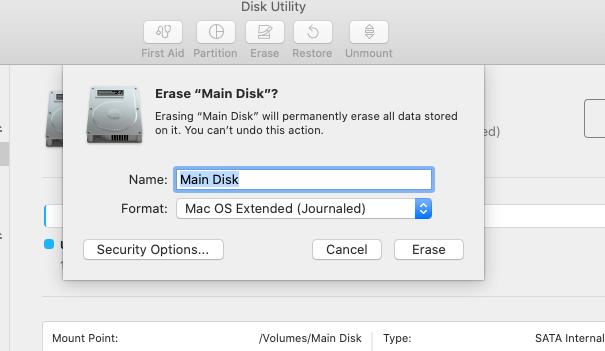
One downloaded, insert your USB drive and open DiskUtil. We’ll erase the drive and format it to Mac OS Extended (Journaled) file system. Also name the drive as “USB” for simplicity
The open terminal and type below command to create a boot drive. This will take some time. Once finished, the drive will be renamed into “Install macOS Catalina”
sudo /Applications/Install\ macOS\ Catalina.app/Contents/Resources/createinstallmedia --volume /Volumes/USB
Now this USB drive will be able to boot on any real Mac. But since we’re going to use it to boot our PC, we’ll need to install Clover Boot Manager. First download the latest release from Github and open the package.
You will need to disable your Mac System Integration Protection (SIP) before you can run Clover EFI Installer. To disable SIP, restart your Mac, and boot into recovery mode by holding Command-R until you see an Apple icon with progress bar. Then open a Terminal from menu bar and type the following command.
csrutil disable
Then restart your Mac again to make the change. You can check the SIP status by using
csrutil status
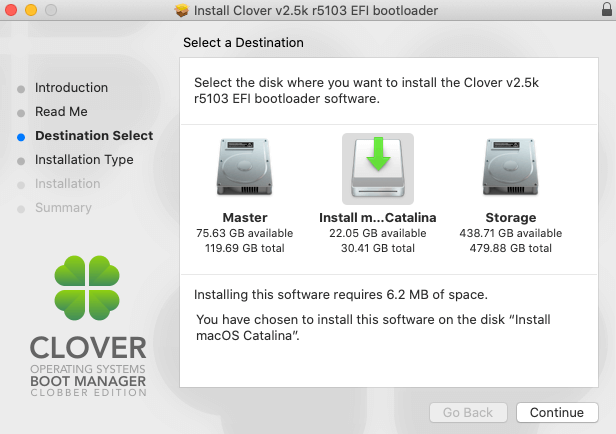
Now run the Clover EFI Installer. Follow the instruction on the screen and select our USB drive as destination.
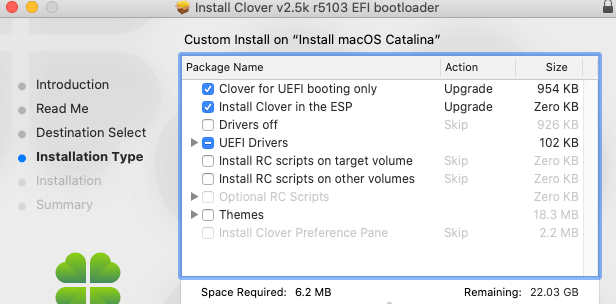
Then click customize button and select the following option. This is to install Clover bootloader and UFEI driver to help our Clover load macOS. Then follow the screen instruction.
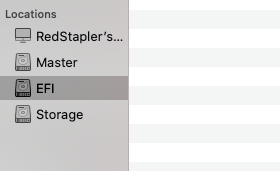
Once Clover has been installed, a new EFI partition will be created on your USB. This is where we will be working on later.
Now this USB will “almost” be able to boot on PC. The next step is to setup boot parameter and preparing kexts files.
Setup Boot Configuration
When Clover is booting macOS, it will look at a system configuration file name “config.plist”. This file contain vital system information which your hackintosh required to boot (ex. “fake” device serial number, SMBIOS, firmware fixes and boot parameters) The file will be in XML format. You can use any text or code editor to change it in raw format. However, there is much easier way. You can download and use Clover configurator tool from here. (Clover configurator is not associated with Clover Boot Manager despite the name)
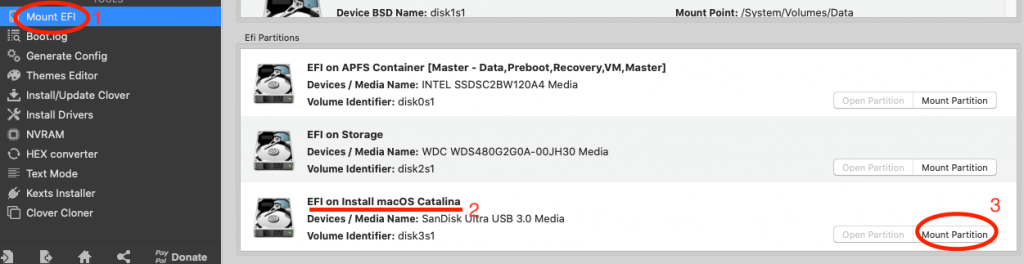
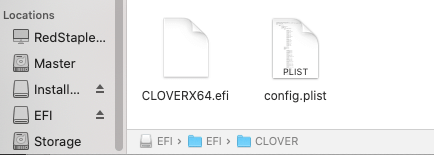
config.plist should be automatically created and placed in your EFI partition under /EFI/Clover/ folder. To browse EFI partition, you’ll need to mount it via Clover Configurator (or via terminal command if you’d prefer the hard way)
Now once you open the config.plist with Clover configurator, you can start customizing the setting. Unfortunately, there is no universal solution. You’ll need to spend some time to research which setting you really need for your build. Here is a very good explanation which option you’ll need for a specific hardware. I will also provide my config.plist setting below for your reference.
ACPI
Advance Configuration and Power Interface or ACPI. This is where you can remap/modify certain hardware definition in Differentiated System Description Table (DSDT). For example, you can change SAT0 to SATA for better SATA device compatibility.
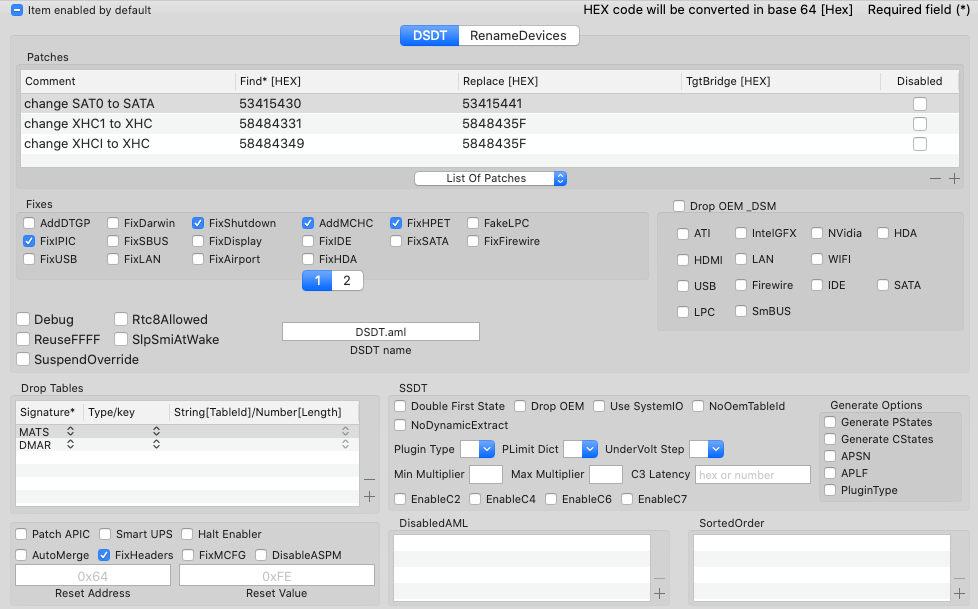
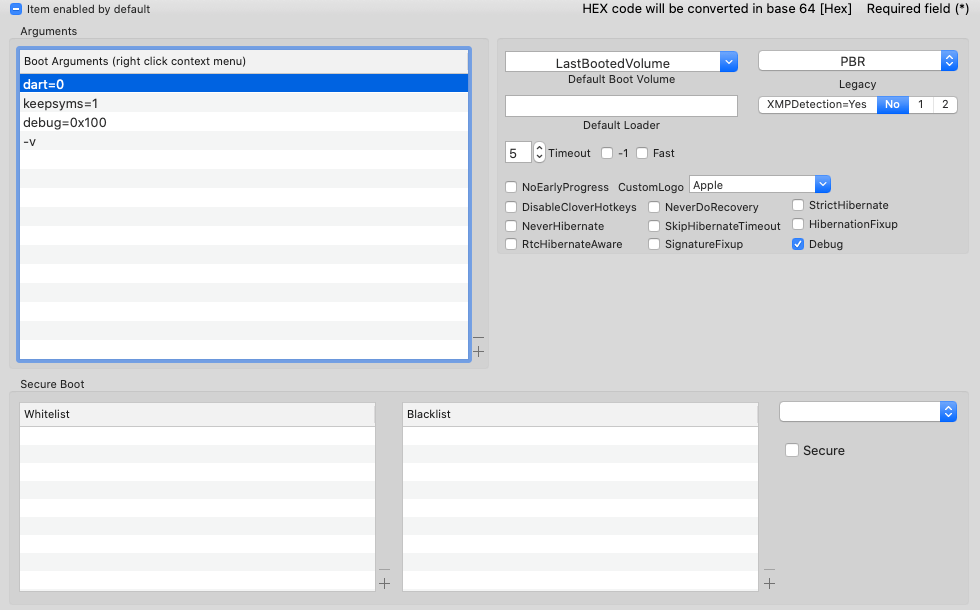
Boot
You can config boot argument like enable verbose mode (-v) to show the boot log instead of Apple logo, enable debug mode (debug=0x100) to avoid kernel panic when there is an issue (causing boot loop) or choose a default boot drive.
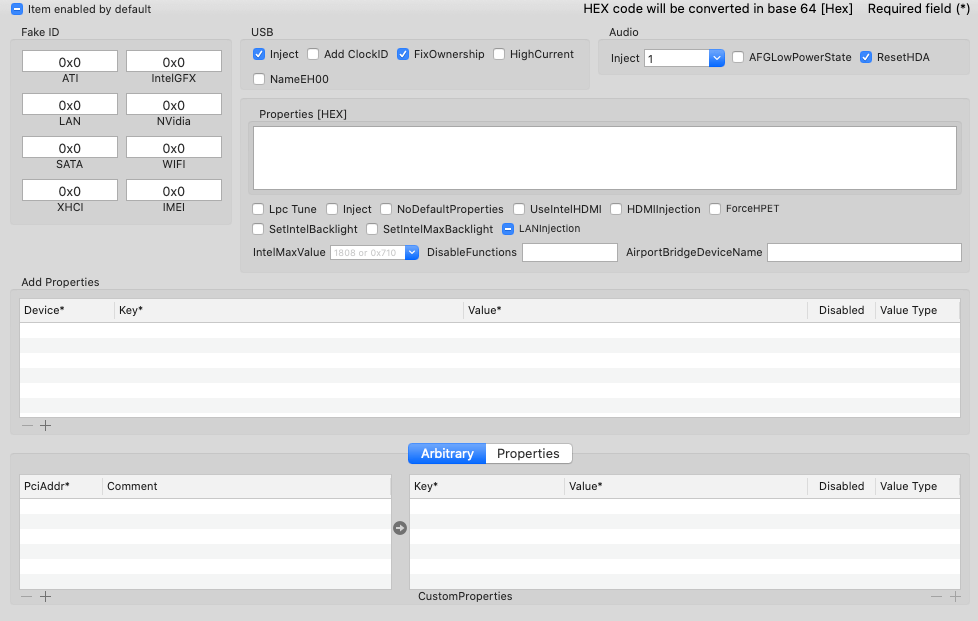
Devices
You can fix device compatibility issue like USB, Audio and unsupported GPU in this tab
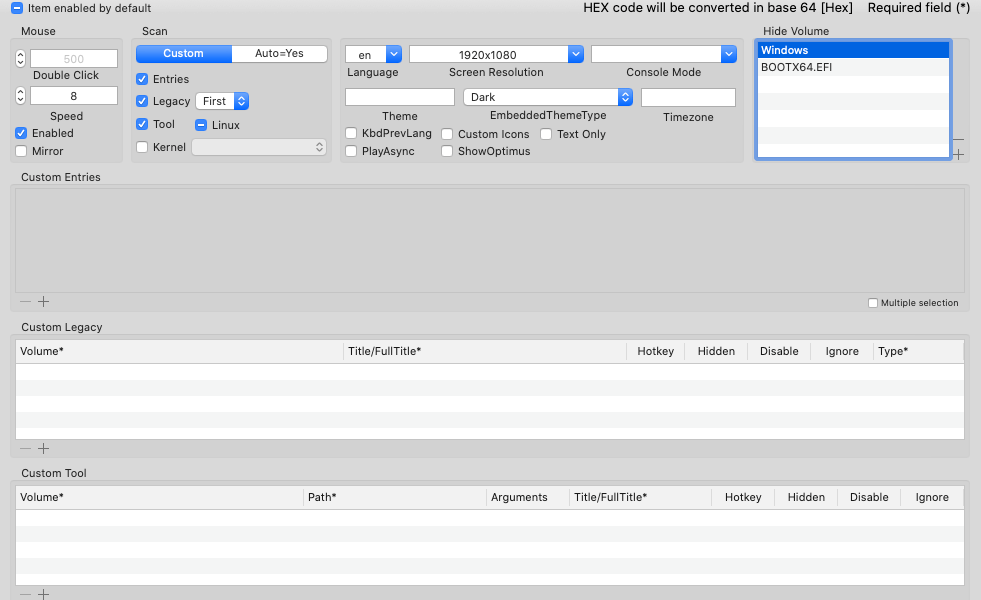
GUI
You can customize Clover boot menu such as changing resolution, theme and custom icons. If you pick theme that doesn’t exist, Clover will revert to a fallback, ugly, low resolution boot menu.
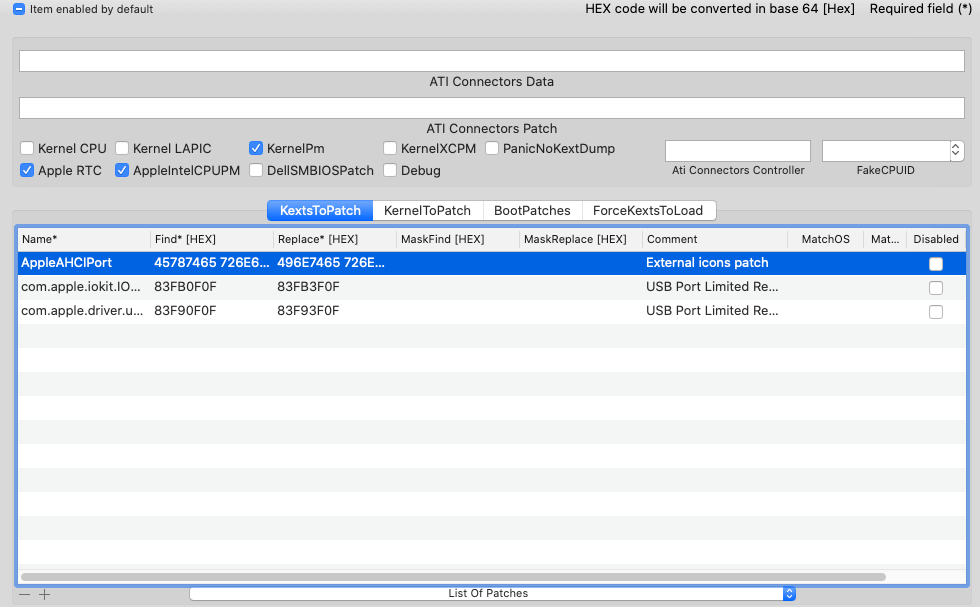
Kernel and Kext Patches
You can apply a custom kexts patch here. For example, I applied a kexts to extend USB port limit. (Mac has a USB port limit at 15 which is not enough, as USB 3.0 will be counted as 2 ports)
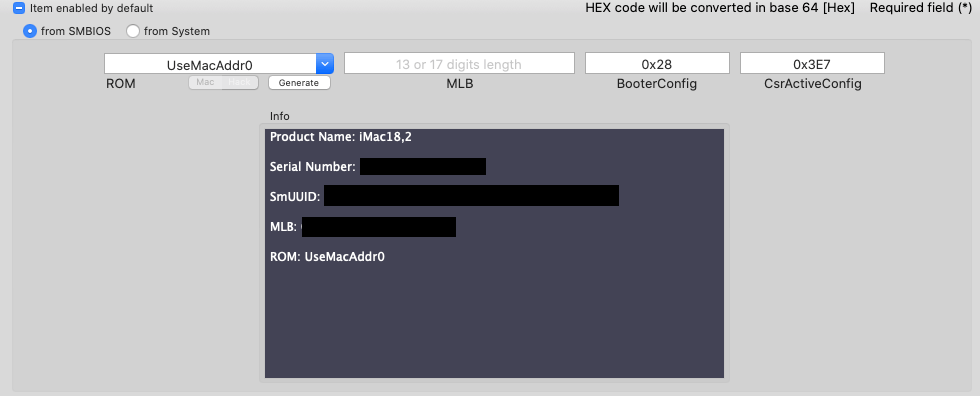
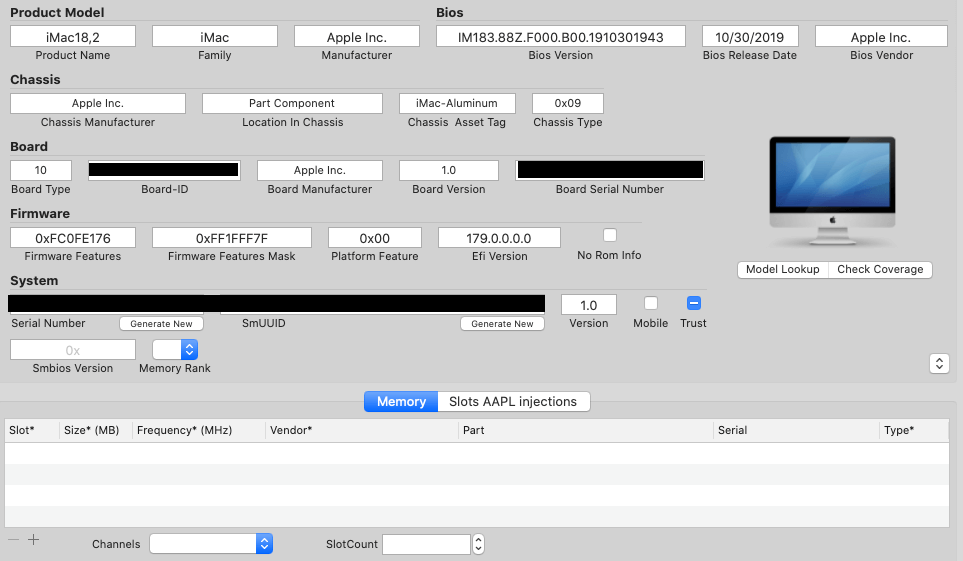
Rt Variables/SMBIOS/System Parameters
This is all about your hackintosh information. You can change Mac model, BIOS version, board and machine serial number, etc. Use values from Mac model that is closest to your build. For me, it’s iMac 18,2. Also don’t forget to check if the generated serial number is already in use by using “Check Coverage” button.

Now config.plist is ready. The next step is to prepare kext files
Preparing Kexts
As I have mentioned before. Kext acts as a driver. So the more supported hardware you have, the less kext you’ll need. Here is the list of popular kexts that are often used.
FakeSMC – This is a Mandatory kext to fake the SMC signal as I have mentioned above. These is a new version call VirtualSMC but I decided not to use it due to some people reported about compatibility issues.
USBInjectAll.kext – Make your USB ports work (Mandatory) You’ll also need to download XHCI-unsupported.kext to enable USB 3 speed.
WhateverGreen.kext – Enables AMD graphic cards. Though natively supported, some find issues when not having this kext (Required Lilu.kext to work)
AppleALC.kext – Enables audio on your hackintosh. You can check the supported audio chipsets here. (Required Lilu.kext to work)
HDMIAudio.kext – If you use a monitor built-in speakers via HDMI, you will need this kext.
FAKEPCIID.kext – Spoof CPU ID for unsupported CPU like Pentium. You’ll also need NullCPUPowerManagement.kext as well.
FakePCIID_Intel_HD_Graphics.kext – Spoof unsupported iGPU ID
IntelMausiEthernet.kext, RealtekRTL8111.kext, AtherosE2200Ethernet.kext – Enables ethernet port for Intel, Realtek, Atheros chipset (only pick one)
After downloaded all kexts, move it to your USB EFI partition under EFI/Clover/kexts/other. All the kexts in this folder will be injected during the boot regardless of macOS version. You can also place kexts in a specific folder to inject kexts for specific OS version (ex. 10.13, 10.14 etc.) but personally, I’d prefer placing all kexts in one place to prevent confusion.
Now kexts and config.plist are setup. Our hackintosh bootable USB drive is finally ready!
BIOS Setting
You’ll also need to make change to BIOS setting to make it compatible with macOS.
- Load your default factory setting (this is to clean any previous setting you have and start with clean slate)
- Disable CPU VT-d (VT-d enable access to hardware from inside virtual machine)
- Disable Secure Boot
- Enable XHCI Handoff
- Change OS Type to Other (If your BIOS has this option)
- Enable iGPU if you want to use it/ Disable if you’re using external card
- Disable Fast Boot
- Disable CSM Support (If your BIOS has this option)
- Disable all Trust computing or BIOS guard options
- Change SATA Mode selection to AHCI
Then change boot priority to boot from your USB drive and save.
Installing macOS
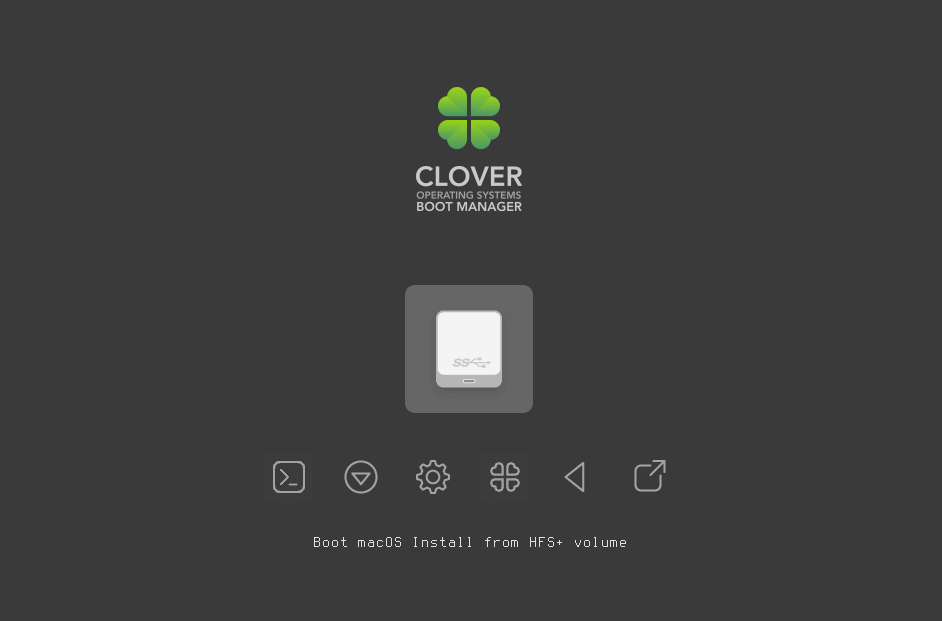
Now boot up your PC, you should see a clover boot menu. Select “Boot Install macOS from Install macOS Catalina” or “Boot Install macOS from HFS+ volume”
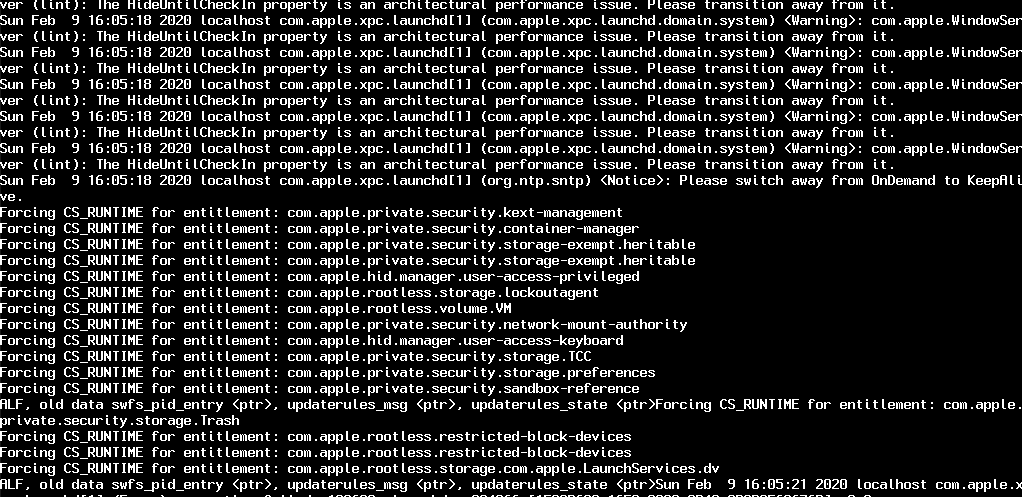
You’ll see boot log due to -v boot argument we set in config.plist
Like Windows, before you can install the OS, you’ll need to format the drive first. So in the macOS Utilities menu, goto Disk Utility and then erase your target disk. Use Mac OS Extended (Journaled) file system.

Then quit Disk Utility, return to the main menu and select “Install macOS”

Follow the screen instruction here until your hackintosh reboots. On the Clover menu, select “Boot macOS Install from [your disk]” and continue the install process until it reboots again. This time, select “Boot macOS from [your disk]” and follow the process.
And your hackintosh is almost ready. However, it still can’t boot on its own without the USB drive.
Post Installation Tasks
Now on your hackintosh, download Clover EFI and install it on your disk using the same setting as we did with USB drive. This will also create an EFI partition on your disk and automatically mounted (If not, you can use Clover Configurator to mount it)
Delete EFI folder inside your disk’s EFI partition. Then copy the EFI folder from your USB drive into it. Your hackintosh should now be able to boot on its own. Eject the USB drive and try restarting it.

Congratulation! you have successfully built your own vanilla hackintosh!!
Troubleshooting
If there is any issue with your hackintosh (ex. sound or wifi doesn’t work) Try to verify if you’re using the right kext for your hardware, check the config.plist setup or monitor your boot log when macOS is loading. Keep the Clover Configurator on your hackintosh so you don’t have to re-download it every time you need.
And that’s it for my vanilla hackintosh guide. Hope you guys enjoy!

Opencore?