Ultra Realistic Water Ripple Effect JavaScript Tutorial
In this tutorial, we’re going to show you how to create a water ripple effect from scratch using JavaScript and Pixi.js library in just a couple minutes! Let’s check it out! (Full Source code at the end of this post)
Create a Scene
Pixi.js is 2D WebGL javascript library that let you create lots of stunning effect easily with just a few lines of code.

First let’s start with download the latest version of pixi.js and include it to your page.
<script src="pixi.min.js"></script>
And here is the example page. The CSS we need for this tutorial is margin:0 and overflow: hidden.
body {
  margin: 0;
  overflow: hidden;
}
Now let’s start with initializing pixi.js. First we need to create an application.
Application object has necessary components to render your scene like renderer, root container and time tracking. This is fastest way to start using Pixi.js unless you want to manually create them one by one. I’m going to supply, our current viewport width and height as the size. Then add the scene to our HTML page as canvas element using app.view
app = new PIXI.Application({width: window.innerWidth, height: window.innerHeight});
document.body.appendChild(app.view);
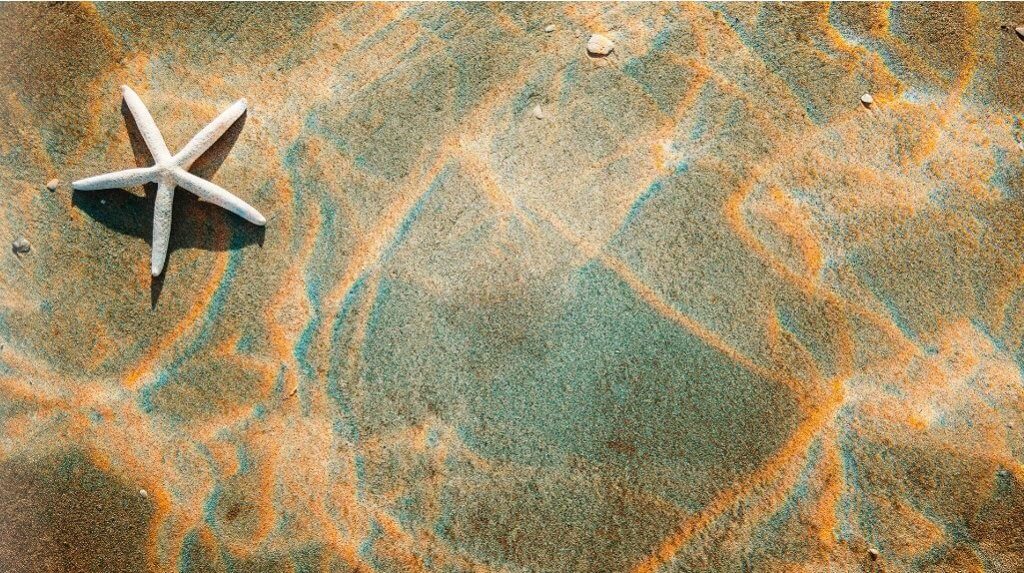
And next we’ll start with adding this image to the scene. Using background image with diffraction light effect like this will help it looks more realistic.

First let’s create a sprite from a jpg image. Then set the width and height. And then add it to the stage
var image = new PIXI.Sprite.from("water.jpg");
image.width = window.innerWidth;
image.height = window.innerHeight;
app.stage.addChild(image);
Displacement Map
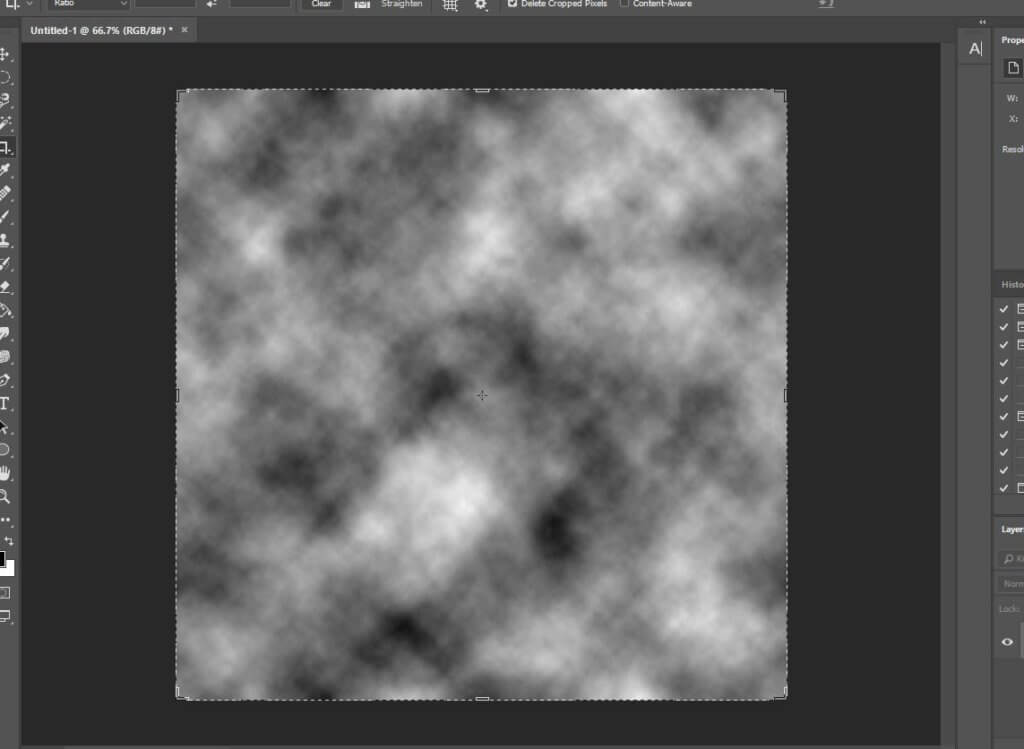
Now to create the ripple effect, we need to move the image pixels away from their original position to create a distortion. With pixi.js this can be done with displacement map. Basically, you just create a random variation of black and white pattern and use it to map with the original image. For tutorial, I’m going to use Photoshop.
First create a new square image, Then use render filter and select cloud. And that’s it that’s all you need.

Now I’m going to create a sprite from this image. Then create a displacement filter from the sprite. We need to set the wrapMode to repeat to make sure the displacement cover the entire image. Then add it to the stage and apply the filter.
displacementSprite = new PIXI.Sprite.from("cloud.jpg");
displacementFilter = new PIXI.filters.DisplacementFilter(displacementSprite);
displacementSprite.texture.baseTexture.wrapMode = PIXI.WRAP_MODES.REPEAT;
app.stage.addChild(displacementSprite);
app.stage.filters = [displacementFilter];
The Animation
At this point everything is ready but still, you won’t see much of the difference. We need to create an animation to move the displacement map to be able to see the ripple effect.
Let’s create animate function and move the displacement map. At the end of the function, we’ll call requestAnimationFrame to start the animation loop.
function animate() {
      displacementSprite.x += 10;
      displacementSprite.y += 4;
      requestAnimationFrame(animate);
}
Many of you might stop at this point, but if you look a little closer, you will see a distortion around the edge. This is normal because we don’t have any pixel beyond that. We can fix it by zooming in a little bit. Just apply the transform scale to the renderer.
displacementSprite.scale.x = 4;
displacementSprite.scale.y = 4;
Also, I think the ripple is a bit too dense. So I’m going to scale the displacement map too.
app.renderer.view.style.transform = 'scale(1.02)';
You can try change and experiment with different displacement map to create various ripple effect. See the final result in the video below.
And that’s it. Just a bit over twenty lines of code for this tutorial. Hope you guys enjoy. Also don’t forget to like or subscribe to our Facebook and Youtube Channel to stay connected with us. See you next time!
Source Code
HTML
<!DOCTYPE html>
<html>
  <head>
    <meta charset="UTF-8" />
    <link rel="stylesheet" type="text/css" href="styles.css" />
    <title>Realistic Water Ripple Effect</title>
  </head>
  <body>
    <script src="pixi.min.js"></script>
    <script>
    var app;
    function initPixi() {
      app = new PIXI.Application({width: window.innerWidth, height: window.innerHeight});
      document.body.appendChild(app.view);

      var image = new PIXI.Sprite.from("water.jpg");
      image.width = window.innerWidth;
      image.height = window.innerHeight;
      app.stage.addChild(image);

      displacementSprite = new PIXI.Sprite.from("cloud.jpg");
      displacementFilter = new PIXI.filters.DisplacementFilter(displacementSprite);
      displacementSprite.texture.baseTexture.wrapMode = PIXI.WRAP_MODES.REPEAT;
      app.stage.addChild(displacementSprite);
      app.stage.filters = [displacementFilter];

      app.renderer.view.style.transform = 'scale(1.02)';
      displacementSprite.scale.x = 4;
      displacementSprite.scale.y = 4;
      animate();
    }
    function animate() {
      displacementSprite.x += 10;
      displacementSprite.y += 4;
      requestAnimationFrame(animate);
    }
    initPixi();
    </script>
  </body>
</html>
CSS
body {
  margin: 0;
  overflow: hidden;
}


can you give me link download source
i use smartphone so i can’t copy source text
A note on this tutorial is that the square cloud image has to be power-of-two-sized for WRAP_MODES.REPEAT to work with WebGL 1.0. So, in the example, 1024×1024 works fine as a displacement texture for this reason.
(Thanks to Ivan Popelyshev for the info.)
Can you update your tutorial, this code is not working with current modern browsers.
Thanks.