
How to Create Game in 10 Minutes with Matter.js
Matter.js is a JavaScript 2D physics engine that is super easy to use. You can create an impressive stuff like this in just a few minutes. And in this tutorial, we’ll talk about the basic concept, engine setup and how to make a simple slingshot game from scratch. Let’s check it out! (Source code at the end of this post)
World Setup
First let’s download matter.js. You can either use npm or just download it for github. Then place the file in the web directory.
For the first step, we’re going to create a world with two simple boxes. Let’s start with creating the Matter.js engine and renderer. Then attach it to the HTML body.
let engine = Matter.Engine.create();

let render = Matter.Render.create({
  element: document.body,
  engine:engine
});
Then the first object we’re going to create in this world is the ground. You can create various types of bodies using method in Matter.Bodies Class. Since it’s a ground, I’ll set the isStatic property to true. So it will not be affected by any external forces and stay fixed (You don’t want the ground to fall down by the gravity)
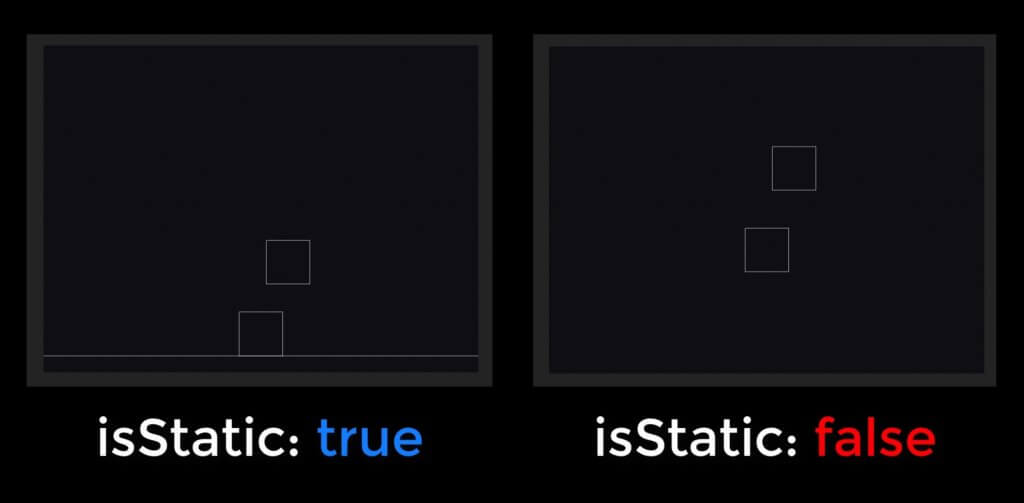
Then I’ll add two boxes using the same method.
//parms: x,y,width,height,options
let ground = Matter.Bodies.rectangle(400,600,810,60,{ isStatic: true});
let boxA = Matter.Bodies.rectangle(400,200,80,80);
let boxB = Matter.Bodies.rectangle(450,50,80,80);
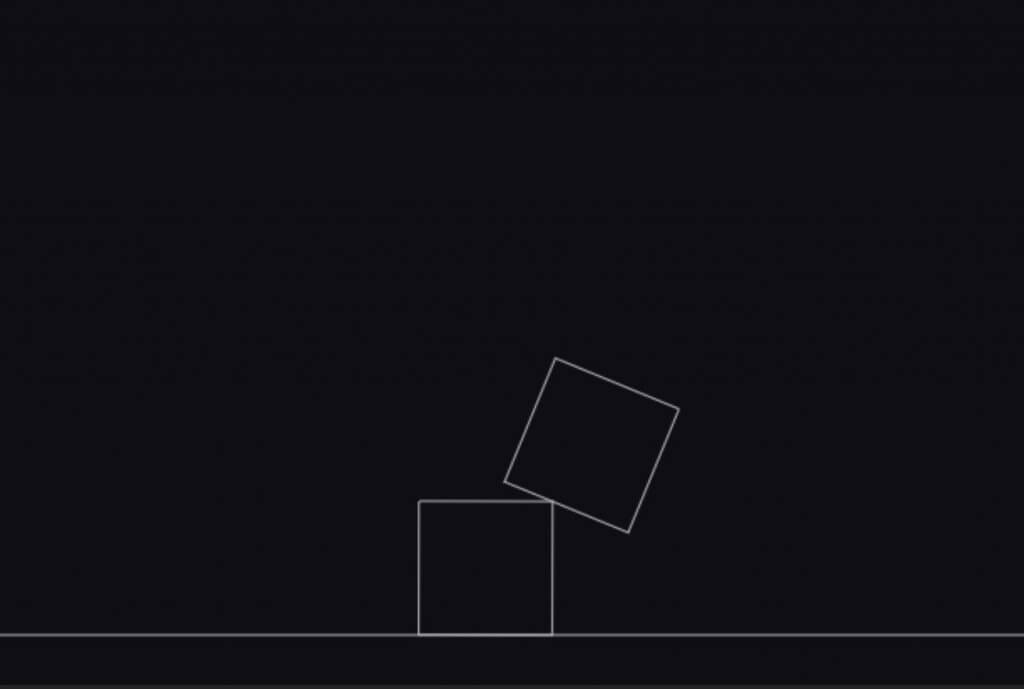
Then we’ll add all the objects to the world using World.add static method and pass the our engine world and array of objects. And finally run both engine and renderer
Matter.World.add(engine.world,[boxA,boxB,ground,mouseCoonstraint]);
Matter.Engine.run(engine);
Matter.Render.run(render);
Adding Mouse Control
At this point you cannot interact with anything in the world. What we’re going to do is the add mouse control.
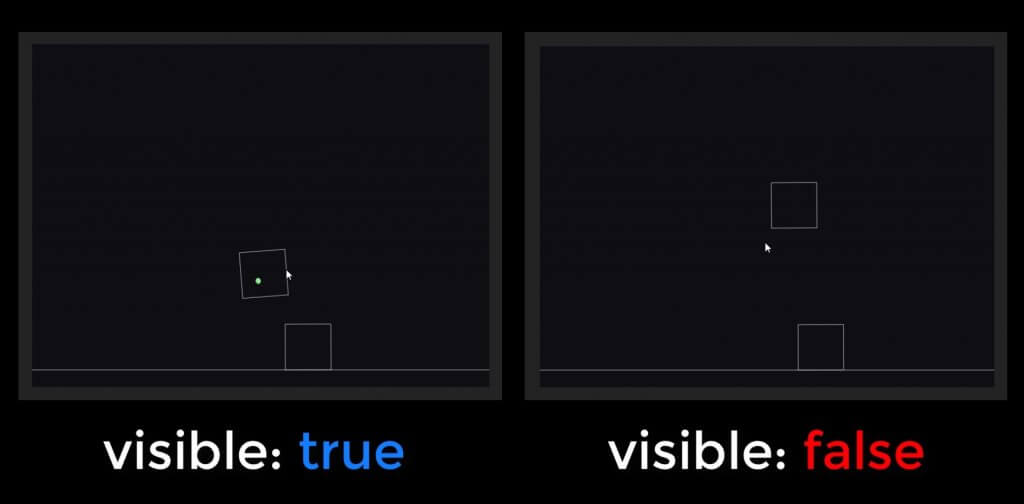
First create a mouse object and pass the rendering canvas as argument. Then we’ll create a mouse constraint for this engine and pass our mouse object into it. As the name state, we can change or add various mouse constraints and options here. For example, we can set the render visible to false. To hide the click highlight.
At the end don’t forget to set the renderer mouse to our mouse object and add the mouse constraint to the world.
let mouse = Matter.Mouse.create(render.canvas);
let mouseConstraint = Matter.MouseConstraint.create(engine, {
  mouse: mouse,
  constraint: {
    render: {visible: false}
  }
});
render.mouse = mouse;

Matter.World.add(engine.world,[boxA,boxB,ground,mouseConstraint]);
And now we have the mouse control and world setup. Let’s work on our game project.
The Slingshot Game
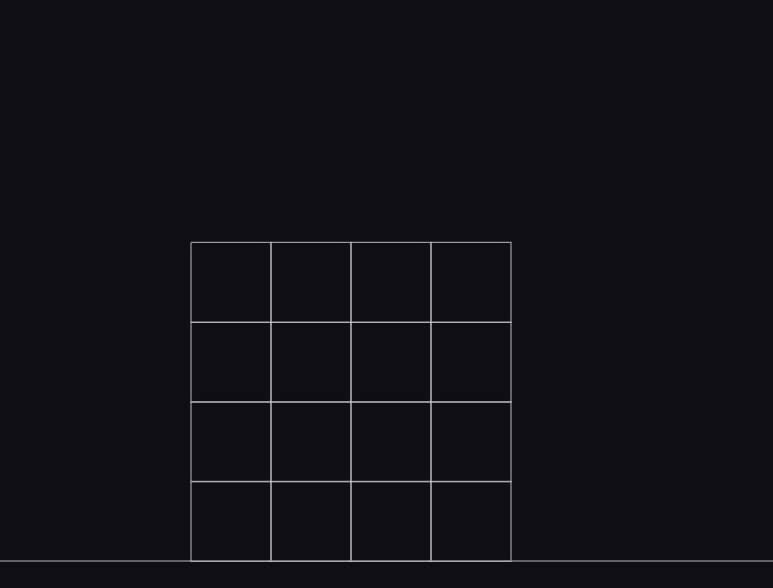
Previously, we used to add each object one by one which is time consuming task. So Matter.js provides a very useful Class call Composites which let you place lots of objects simultaneously into various structures like pyramid or stack.
For example, I can create a 4×4 of 80 pixels rectangle stack like this
let stack = Matter.Composites.stack(200,200,4,4,0,0, function(x,y){
  return Matter.Bodies.rectangle(x,y,80,80);
});
Now let’s setup our game level. I’ll change create a platform on the top-right of the screen. Then create a stack of octagon and place it on the platform.
let platform = Matter.Bodies.rectangle(1200, 500, 300, 20, { isStatic: true });
let stack = Matter.Composites.stack(1100, 270, 4, 4, 0, 0, function(x, y) {
    return Matter.Bodies.polygon(x, y, 8, 30);
});
Next create a ball that we’re going to fire. I’ll place it on the left side of the screen. Then create a sling using Constraint class. The first attribute is pointA which will be the fixed point of the sling. I’ll set it to the same position with the ball. Next is bodyB which is an object that we want to attach it to the sling. I’ll set it to the ball.
Last one is the stiffness of the sling. For this tutorial let’s set it to 0.05
let ball = Matter.Bodies.circle(300, 600,20);
let sling = Matter.Constraint.create({
      pointA: { x: 300, y: 600 },
      bodyB: ball,
      stiffness: 0.05
  });
Next we’ll work on the firing event.
In order to fire, we have to drag the ball and release the mouse button. So the most suitable event we should use is the endDrag. Inside the event handler we’ll check if the triggering object is the ball then we’ll set the firing flag to true.
let firing = false;
Matter.Events.on(mouseConstraint,'enddrag', function(e) {
  if(e.body === ball) firing = true;
});
Then we’ll keep checking the position of the ball on every screen update using afterUpdate event. So if firing flag is true and the ball position is very close to the original point, then we’ll release the ball from the sling and replace it with the new one. To do this I’ll subtract the current position with the original and check the absolute value.
If the condition is met. Then create a new ball at the starting position and add it to the world. Then set the sling bodyB attribute to the new ball. And reset the firing flag.
Matter.Events.on(engine,'afterUpdate', function() {
  if (firing && Math.abs(ball.position.x-300) < 20 && Math.abs(ball.position.y-600) < 20) {
      ball = Matter.Bodies.circle(300, 600, 20);
      Matter.World.add(engine.world, ball);
      sling.bodyB = ball;
      firing = false;
  }
});
And here is the result. See the live action in video below. You can download the final source code here

This is just the basic of matter.js You can try experimenting the demo on the library page to utilize the full potential of matter.js. I hope this tutorial helped you get started of the basic concept and how to use it.
If you love this and want to see more development tips and tutorials, subscribe our YouTube Channel to stay tune
