
How to Setup Axelar Node on Google Cloud [Complete Guide]
Running your own node is the very first and essential step of development. Axelar provided tutorial on how to setup your node here. Unfortunately, it didn’t cover about hardware and network setup. So in this post, I will write a step-by-step tutorial on how to setup Axelar node from scratch on Google Cloud Platform (which I think it’s the quickest and easiest way without physical hardware)
Topic that we’ll cover
- Overview of how Axelar node is working
- Overview of node setup process
- Preparing virtual machine
- Preparing network setup
- Running node process
- Checking node sync status
- Requesting AXL token on Testnet
(You might want to read our previous post to understand more about Axelar network and how it works)
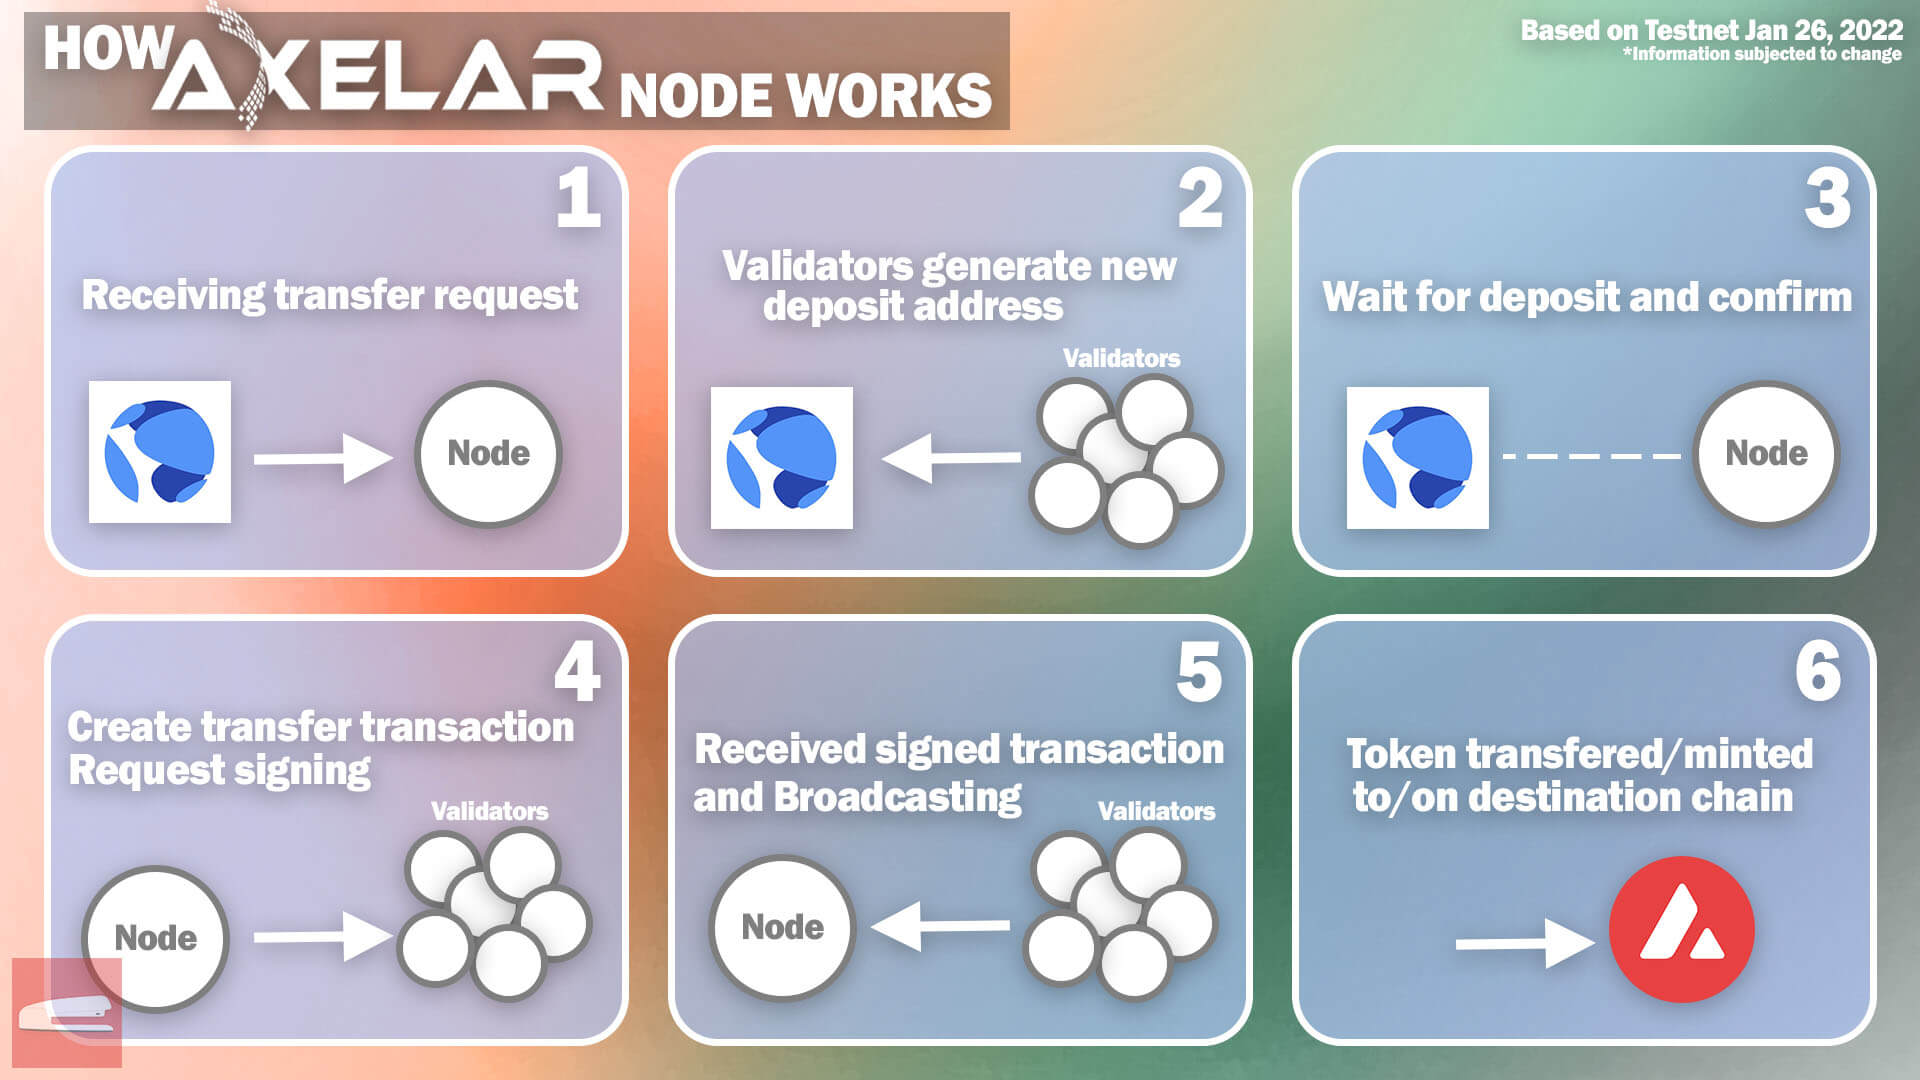
How Axelar Node Works
Let’s suppose we want to make a cross-chain transfer from Terra to Avalanche.
- Axelar node receives the transfer request from user (or application)
- Validators generate new deposit address
- Wait until deposit transaction is confirmed
- Axelar validators create a mint/transfer transaction for destination chain and sign it
- Transaction is signed and user or application can broadcast it
- Asset is minted on/transferred to destination chain successfully
These can be sum-up into infographic below
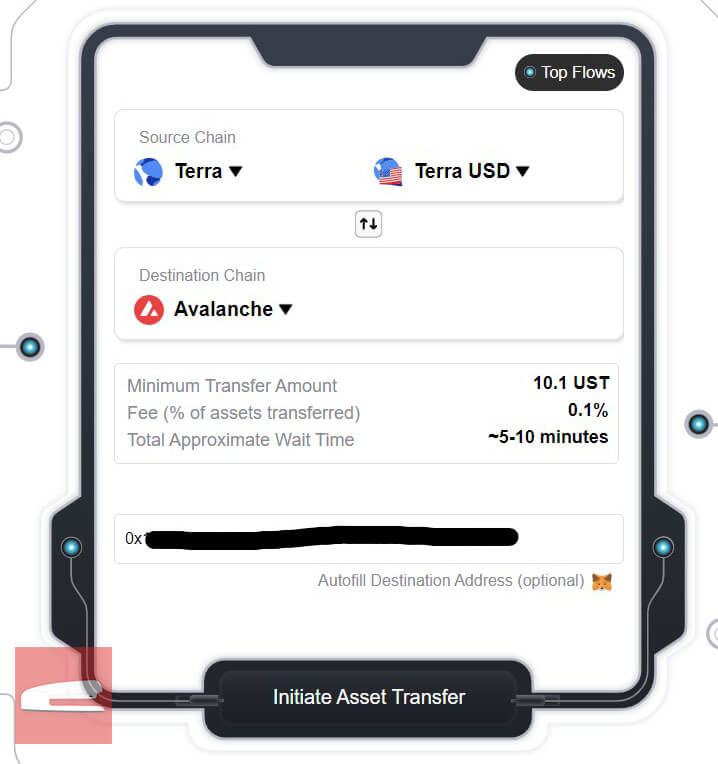
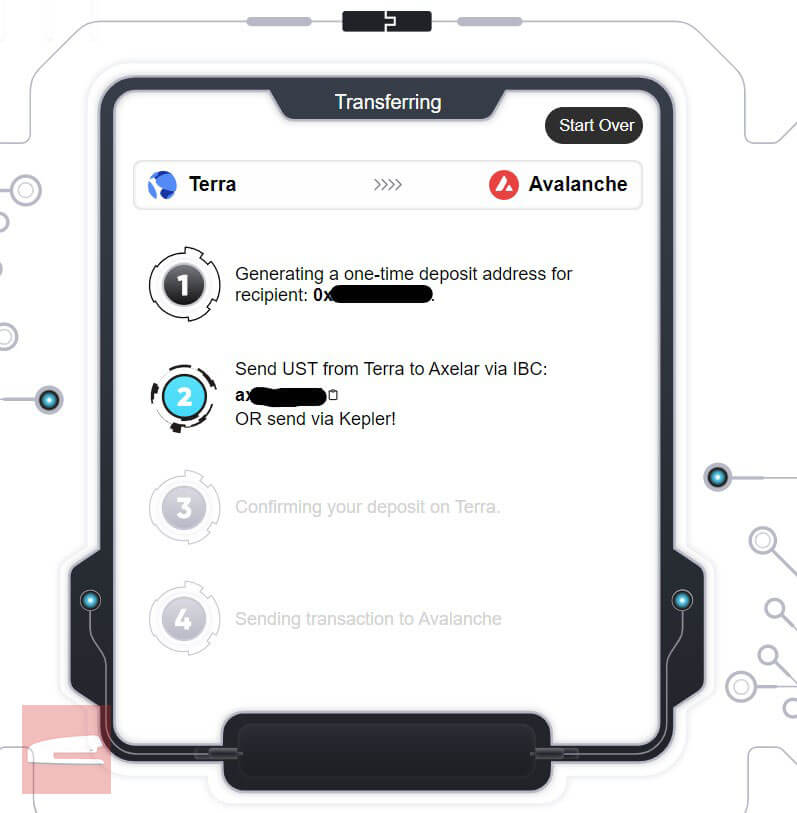
Update: Satellite cross-chain asset transfer application is now available. Here is what the process looks like from end-user perspective.
Next let’s work on setting up the node.
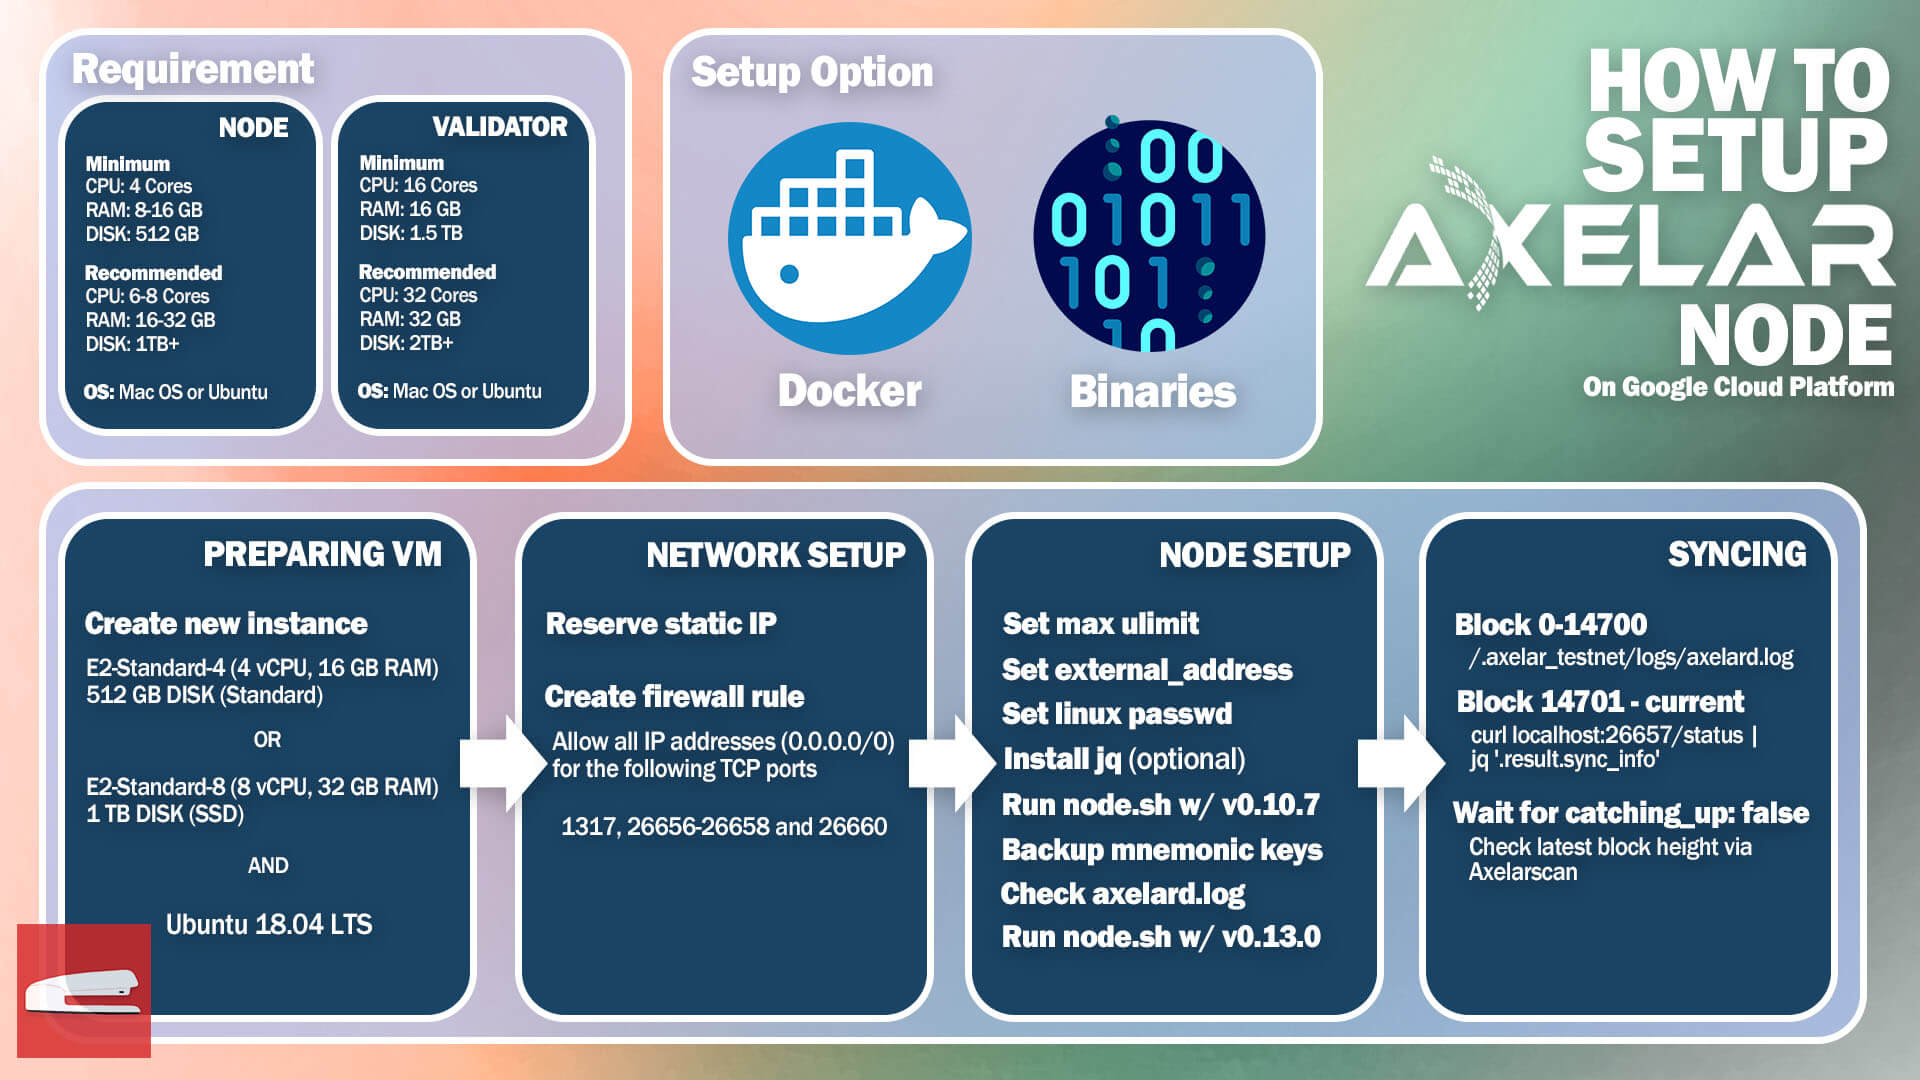
Setup Process Overview
There are two ways to setup Axelar node. Docker and Binaries. In this tutorial, I’ll go with binaries (but it’s up to your preferences)
First, we need to prepare the VM to meet the node requirement and configure the network setting. Then we’ll setup the necessary binaries and run the node process to sync up with the network with the correct upgrade path.
Here is the infographic of overall process.
Let’s get started 😎
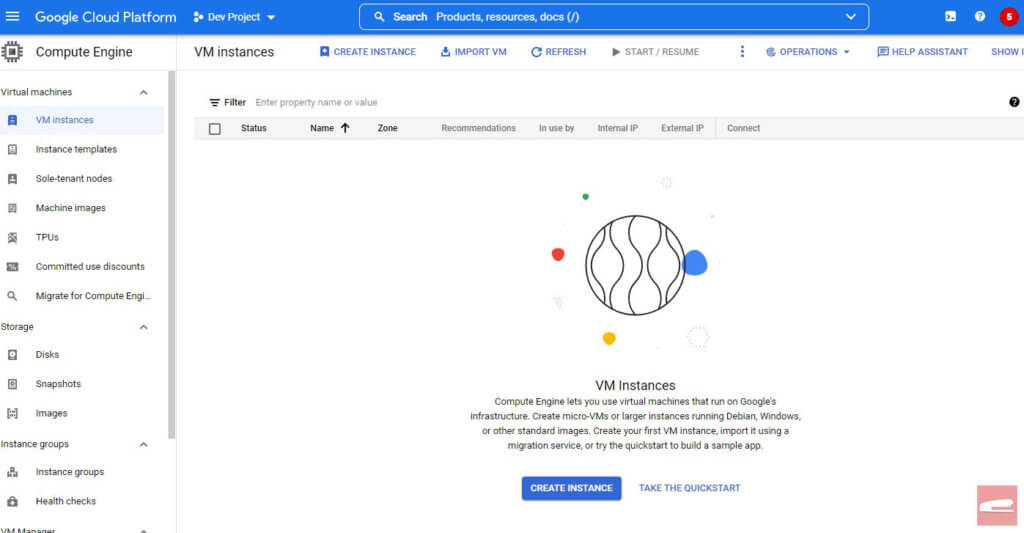
Preparing VM Instances
First go to Google Cloud Platform and create new VM instance. You’ll be asked to create a new project if this your first time using GCP.
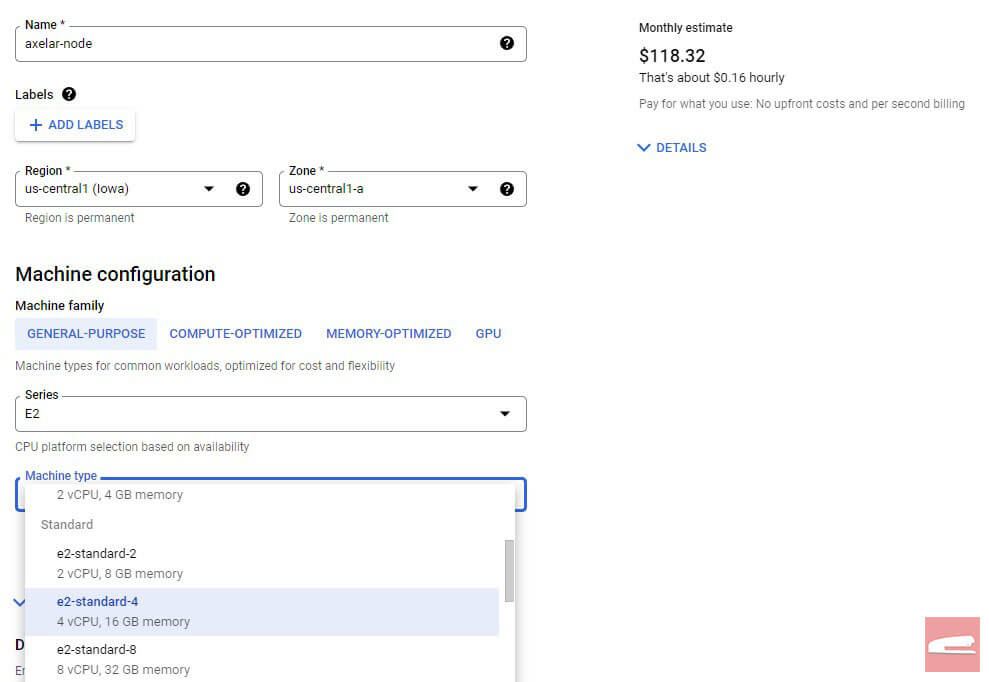
The minimum hardware requirements for running Axelar node is 4 cores CPU, 8-16GB RAM and 512 GB drive. Since we’ll be running a testnet node, a general purpose e2-stanard-4 (4 vCPU, 16GB RAM) should be more than enough (mainnet is not available yet when I’m writing this post)
For operating system we’ll use Ubuntu 18.04 LTS which is the version that axelar-core has been tested on. I’ll use 512GB standard persistent disk for the storage as it’s the cheapest option here but you can pick SSD for faster node syncing speed if needed. (testnet only, SSD is a must on mainnet)
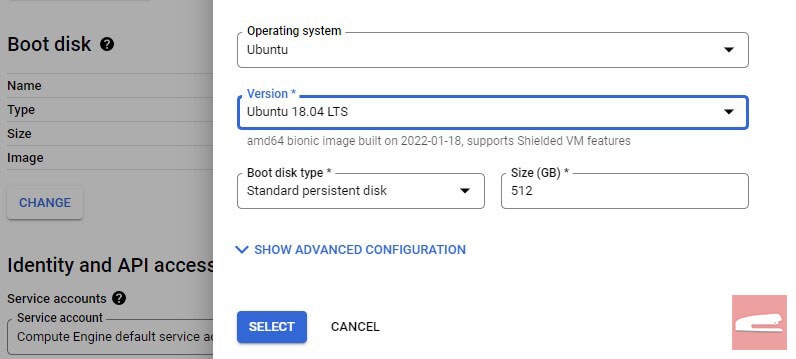
Your VM instance is ready. Next we’ll reserve the static IP address and firewall rules.
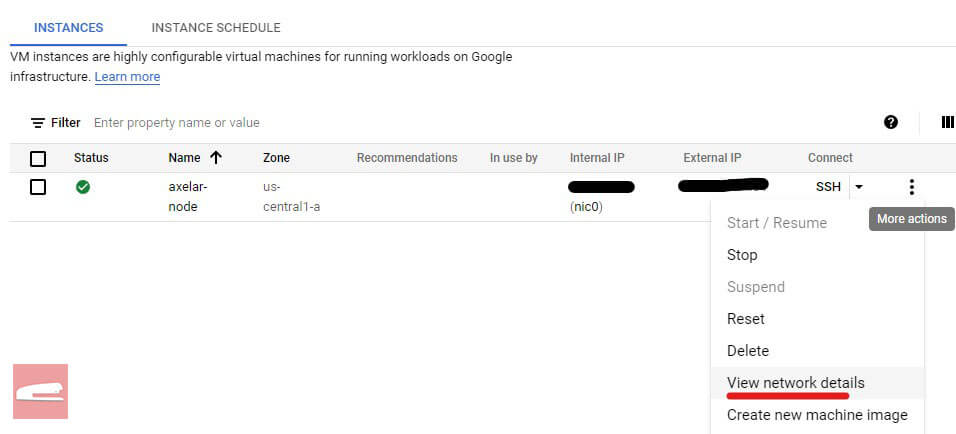
Setting up Network
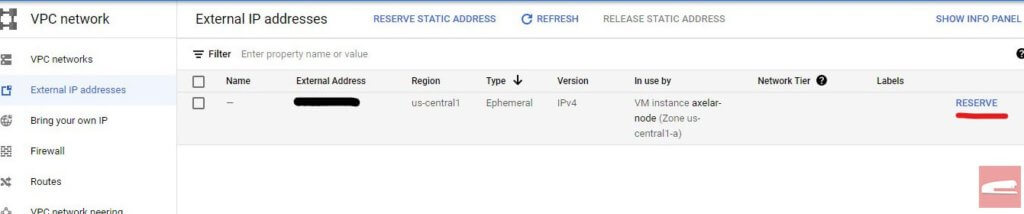
First we’ll need to reserve a static IP address for our node. Select “View network details” from your instance.
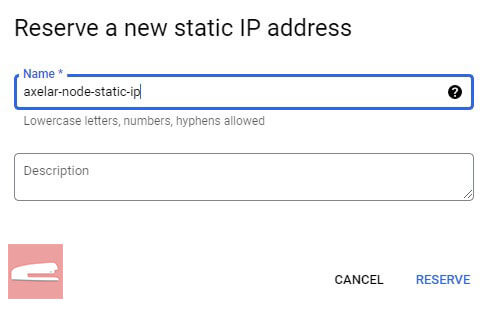
Select “External IP Addresses” Tab and click “Reserve” and name the address to reserve static IP Address
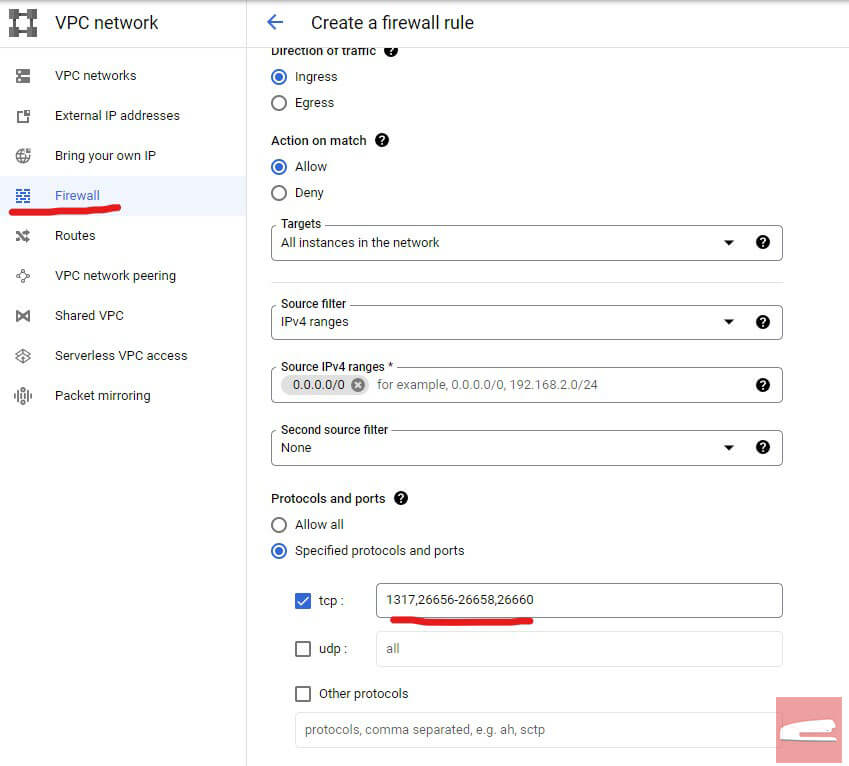
Next we’ll have to setup the firewall rules. By default Google Cloud block all ingress traffic on all ports except explicitly allowed. So we’ll have to allow all necessary ports for our node.
Under “Firewall” Tab, create a new firewall rule and allow the following TCP port 1317,26656-26658,26660 for all IP addresses (using IPv4 range 0.0.0.0/0)
Now your VM and network are ready.
Setting up Axelar Node
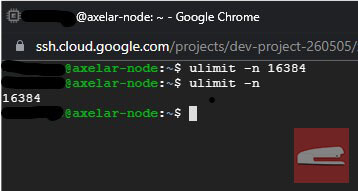
First SSH to your VM and change the maximum number of open files allowed to 16384 using the following command. Not doing so will cause an error panic message “too many open files”
ulimit -n 16384
But this is just a temporary setting and it will reverted back to default number of 1024 if your node restart. To automate this, you can add the command to the startup script so you don’t have to type it every time.
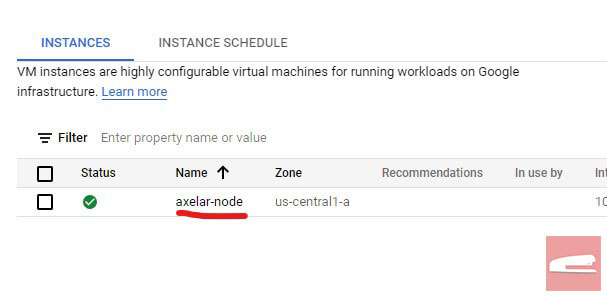
On GCP console, click your node’s instance name and click “Edit”
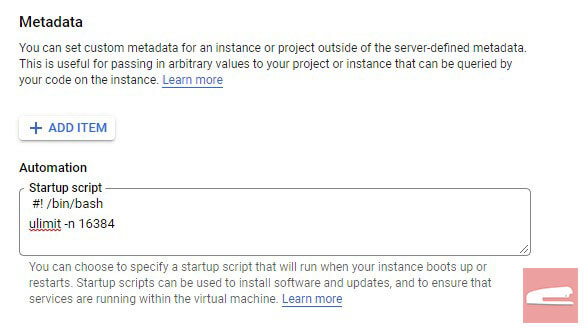
Add the following command in Automation – startup script box
#! /bin/bash
ulimit -n 16384
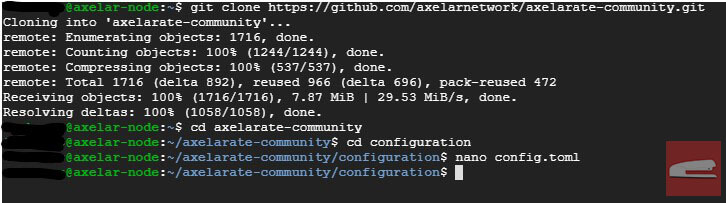
Next, clone the axelarate-community. Once finished, change the directory to axelerate-community/configuration and edit config.toml file. (I’m using nano but you can use any editor of your choice)
git clone https://github.com/axelarnetwork/axelarate-community.git
cd axelarate-community/configuration
nano config.toml
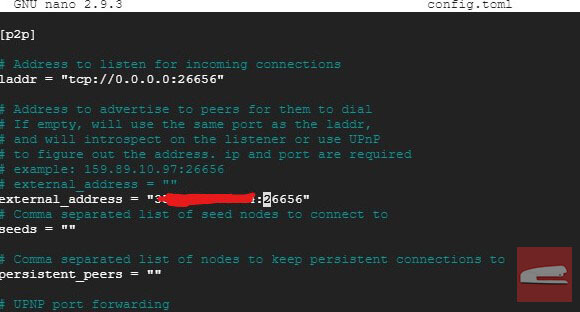
Scroll down to find the external_address line and add your node public IP address follow by port 26656. Press Ctrl+X to exit and save the file.
Almost there, you’ll need to setup your linux account password before running the node.
sudo passwd

Since we’re running the node from scratch, we’ll need to catch up the block. However, you’ll need a different version of axelar-core for block 0-14700. So you’ll have to run the process twice.
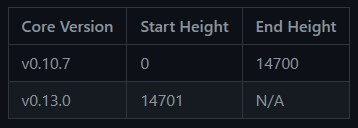
Next start the node process by running node.sh in axelarate-community/script directory. We’ll use v0.10.7 for the first run. We’ll set the environment variable KEYRING_PASSWORD to your linux password.
Note: You’ll see some of the docs still refer to join-testnet.sh instead which is outdated. node.sh is the scripts that should be used.
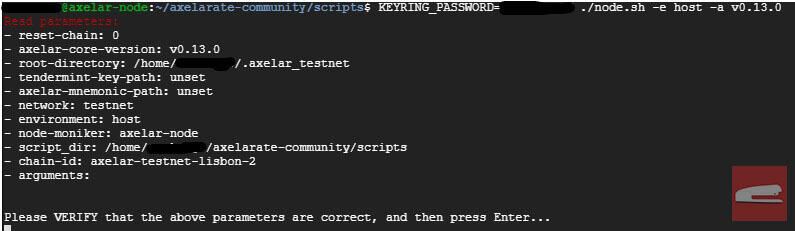
KEYRING_PASSWORD=[yourpassword] ./node.sh -e host -a v0.10.7
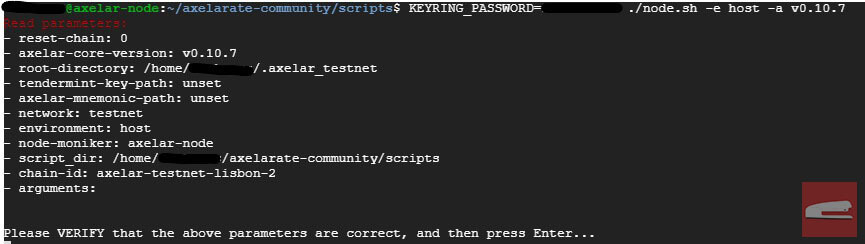
Verify that the parameters are as follow. Especially the chain-id which should be axelar-testnet-lisbon-2 and start the process. You will see your node address, mnemonic key and tendermint key. Back them up somewhere safe and delete ONLY the mnemonic key
Note that the console is using the word “validator” but that is just only the account name and you are not yet a validator.
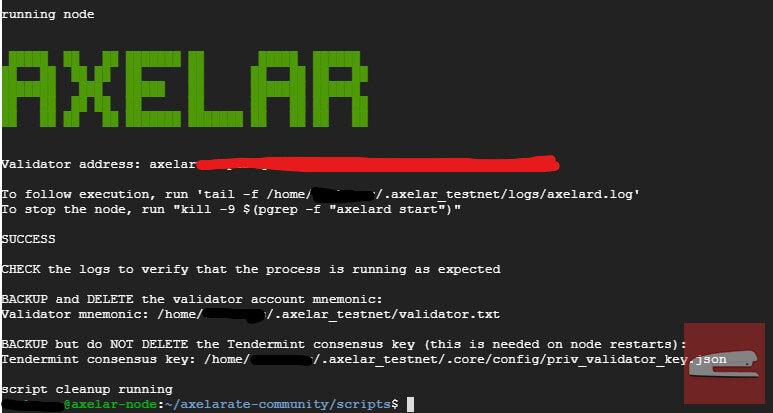
rm ./axelar_testnet/validator.txt
Then let the node sync the block for a while. You can track the sync status by viewing /.axelar_testnet/logs/axelard.log file.

If the first node sync is complete (block 0-14700) you will see “panic: UPGRADE” message as follow.
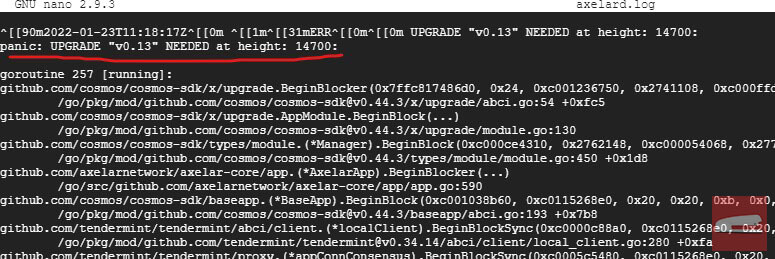
We’ll restart the node sync from block 14701 with v0.13.0 core version.
KEYRING_PASSWORD=[yourpassword] ./node.sh -e host -a v0.13.0
This time, node sync will take quite a while to catch up depending on your VM performance (CPU/Disk) It took me around 3 days to fully sync.
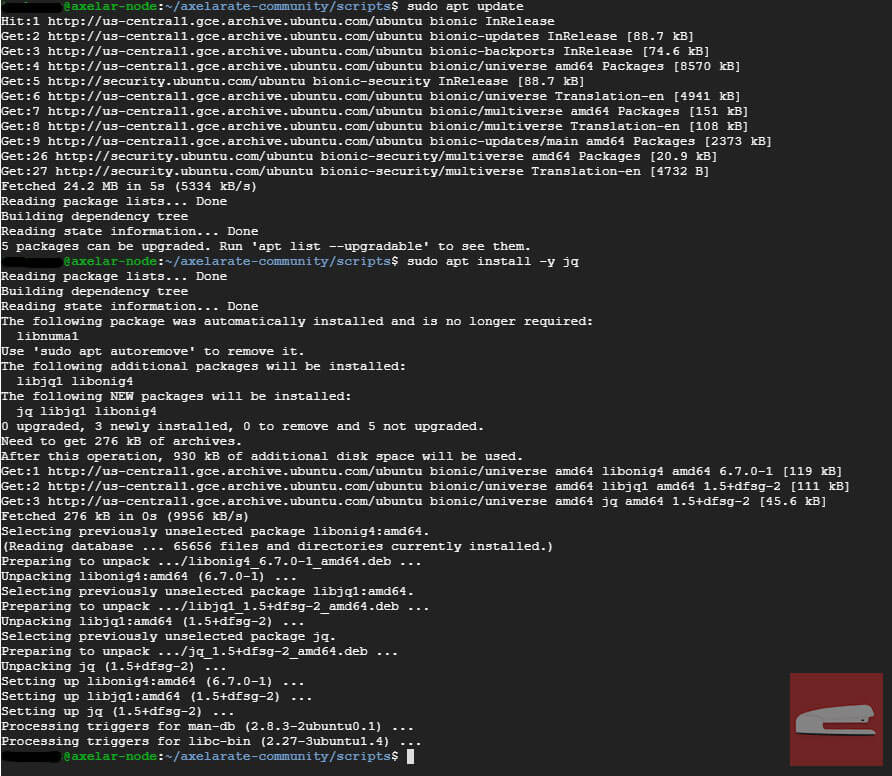
To track the sync and node status, we can access it via port 26657. But since the status will be returned in JSON format, you might want to install jq to view it (optional)
sudo apt update
sudo apt install -y jq
Then you can track the status using
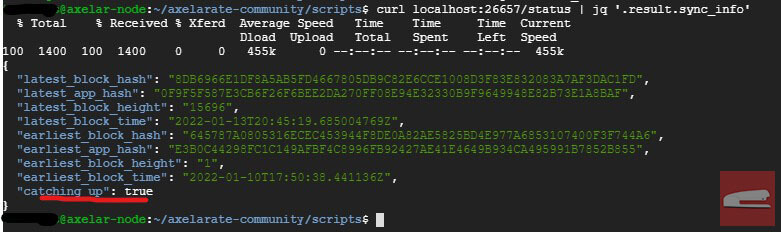
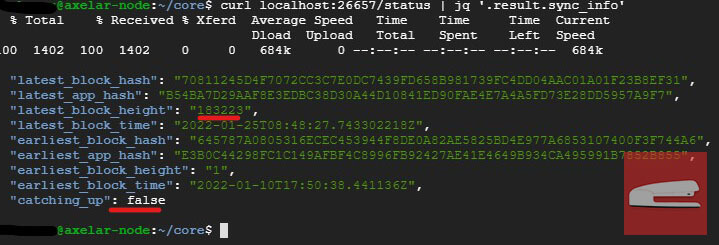
curl localhost:26657/status | jq '.result.sync_info'
You can see the sync status via “latest_block_height” The catching_up flag will set to false once fully synced.
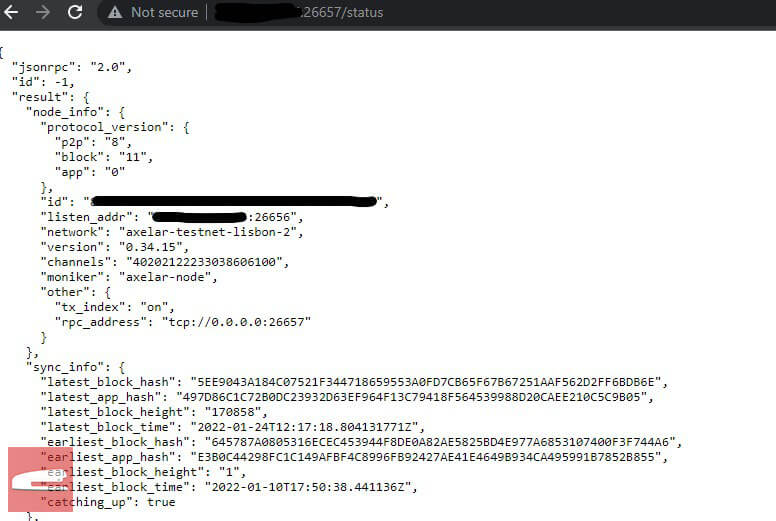
Alternatively you can query the sync status by accessing your node via browser without using curl from SSH.
You can check the current block on Axelarscan
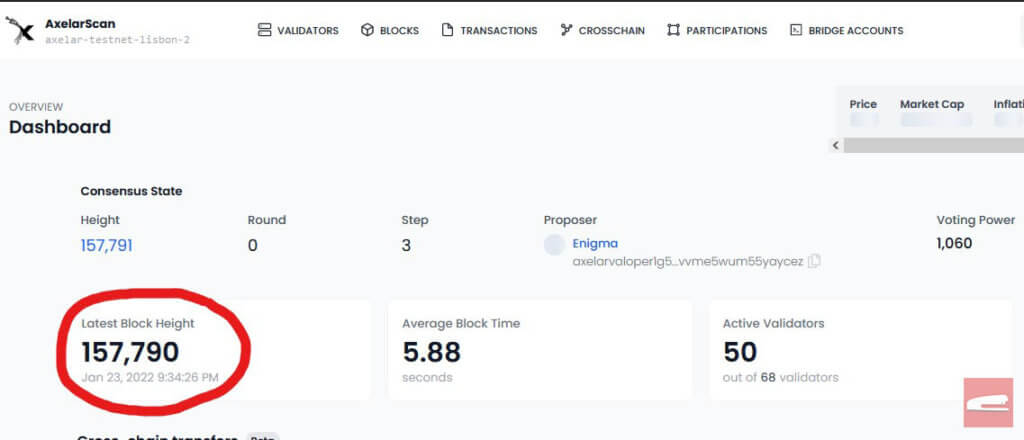
Once the node catched up, you’ll see the following status message.
Congratulation! You are now one of the Axelar node operators! However, extra steps are needed if you want to run your node as a validator. Check the official docs on how to setup a validator.
Further Testing
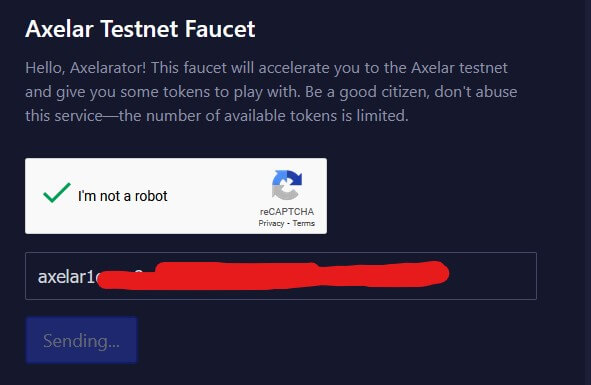
To continue testing further on Axelar testnet, joining as a validator or signing transaction, you’ll need Axelar token. You can request it from Testnet facet.
You can view your node address by using this command and then type in your keyring password. Again the “validator” is just the name of your account.
~/.axelar_testnet/bin/axelard keys show validator -a --home ~/.axelar_testnet/.core
Now to check you AXL token balance, use the command below (replace {MY_ADDRESS} with your node address) You’ll see the balance only if your node already synced (catching_up: false)
~/.axelar_testnet/bin/axelard q bank balances {MY_ADDRESS} --home ~/.axelar_testnet/.core
That’s all for this tutorial.
Reference
- Axelar Developer Documentation – Link
- Axelar Whitepaper – Link
- Axelerate Community – Link
- Google Cloud, Machine Families – Link
- Google Cloud, Using startup scripts on Linux VM – Link
- Ubuntu Manual, ulimit – Link
