
Defer Render-Blocking CSS in WordPress (No Plugin)
Render-blocking CSS is one of the reason of slow website loading speed. By default, web browser have to wait for all CSS to finish loading before it can start rendering website. During this time, user will see a blank page with nothing to interact resulting in bad experience. In this post, we’ll show you the way to defer render-blocking CSS loading in WordPress website to improve respond time.
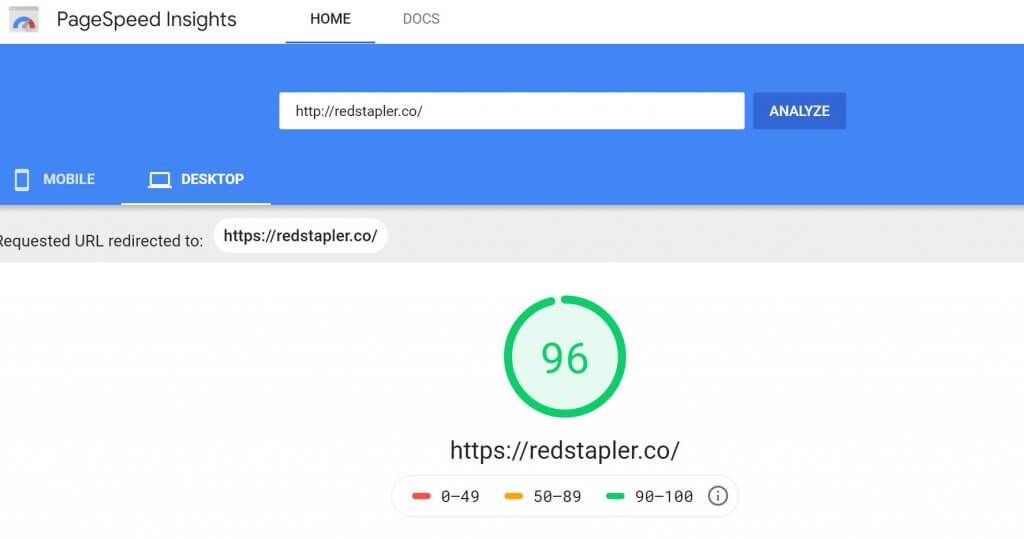
PageSpeed Insight
Website loading speed is becoming more and more important as Google is experimenting using speed as search ranking factor. The easiest way to test your website speed is to use Google’s provided tool – PageSpeed Insight which will give you the “speed score” and optimization opportunities.
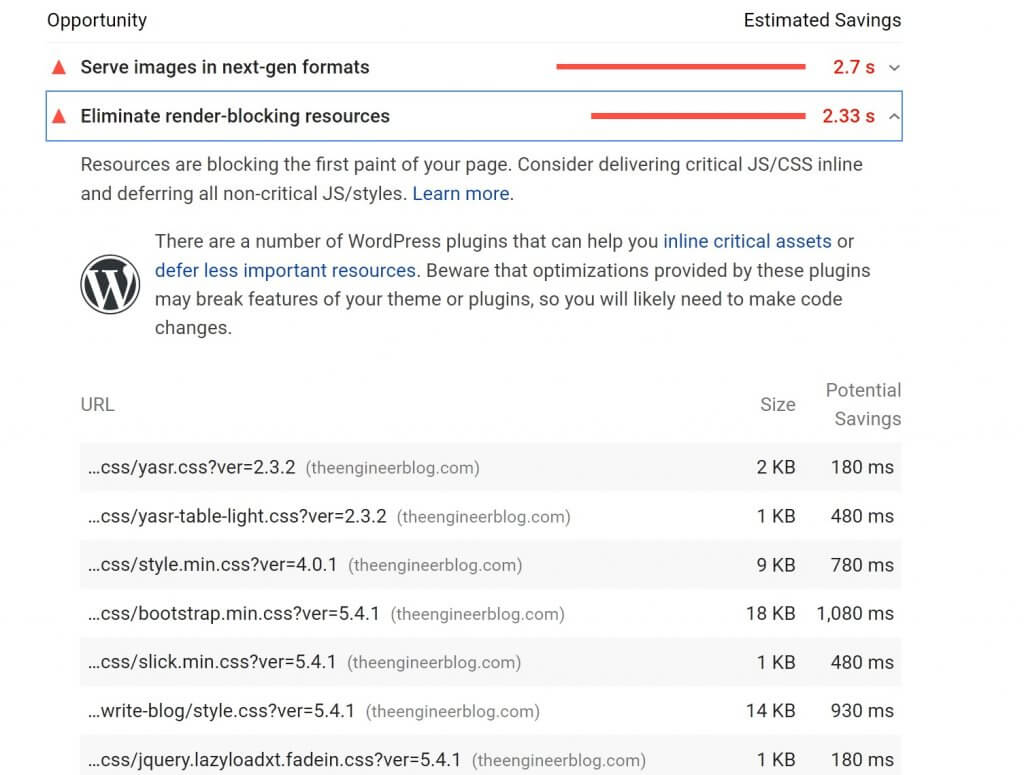
One of the opportunities you usually found is to “Eliminate render-blocking resources”. Especially, if you have lots of installed plugins (since each plugin often add 1-2 CSS files to your website)
Deferring Render-Blocking CSS
Here is how each CSS file is usually being imported in WordPress
<link rel='stylesheet' href='../plugin.css' type='text/css' media='all' />
To load this CSS file asynchronously, change it to this
<link rel='stylesheet' href='../plugin.css' media="print" onload="this.media='all'" />
The concept is to change the media from media=”all” to media=”print”. This will tell the browser that this CSS file should be used when printing the webpage and therefore, a non render-blocking resource. And finally use onload event to change the media back to “all”.
This works in all major/modern browsers and no need for polyfill or JavaScript!
Note: The old solution is to use rel=”preload” but it’s not supported in all browsers and require some JavaScript intervention to make it work.
Make it Works in WordPress
WordPress theme use wp_enqueue_style in function.php to add CSS into head section. For example, here is how the theme import ionicons.css.
wp_enqueue_style('ionicons', get_template_directory_uri() . '/assets/lib/ionicons/css/ionicons' . $min . '.css');Just comment that line out
//wp_enqueue_style('ionicons', get_template_directory_uri() . '/assets/lib/ionicons/css/ionicons' . $min . '.css');Then add the CSS file manually in header.php. That’s it! No plugin needed at all.
<link rel='stylesheet' id='ionicons-css' href='[path-to-css-file]/ionicons.min.css?ver=5.4.1' media="print" onload="this.media='all'" />
Thanks for reading. If you love this and want to see more development tips and tutorials, subscribe our YouTube Channel to stay tune 🙂

why don’t you use the wp_head function ?