Create Curved/Custom Shape DIV with CSS+SVG
In this tutorial, we’ll show you how to easily create a custom shape div using SVG and CSS in just a few minutes!
The DIV
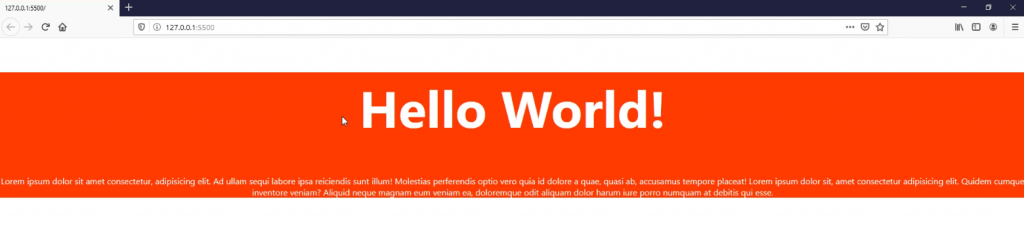
So first let’s start with HTML structure. I’m going to create a div and assign a class to it. Then put some headline and paragraph.
<div class="curved-div">
      <h1>Hello World</h1>
      <p>Lorem ipsum dolor sit amet, consectetur adipiscing elit. In orci lorem, porttitor nec vulputate sit amet, fermentum a purus....</p>
    </div>
Next the CSS. I’m going to set the background and text color and text-alignment to center. Then increase font-size and set the font-family for aesthetic.
.curved-div {
  background: #ff3c00;
  color: #FFF;
  text-align: center;
}
.curved-div h1 {
  font-size: 6rem;
  font-family: -apple-system, BlinkMacSystemFont, 'Segoe UI', Roboto, Oxygen, Ubuntu, Cantarell, 'Open Sans', 'Helvetica Neue', sans-serif;
}
.curved-div p {
  font-size: 1rem;
  font-family: -apple-system, BlinkMacSystemFont, 'Segoe UI', Roboto, Oxygen, Ubuntu, Cantarell, 'Open Sans', 'Helvetica Neue', sans-serif;
}
Here is our current div. You’ll notice the space at the top because of the h1 margin. We’ll remove that later.
The SVG
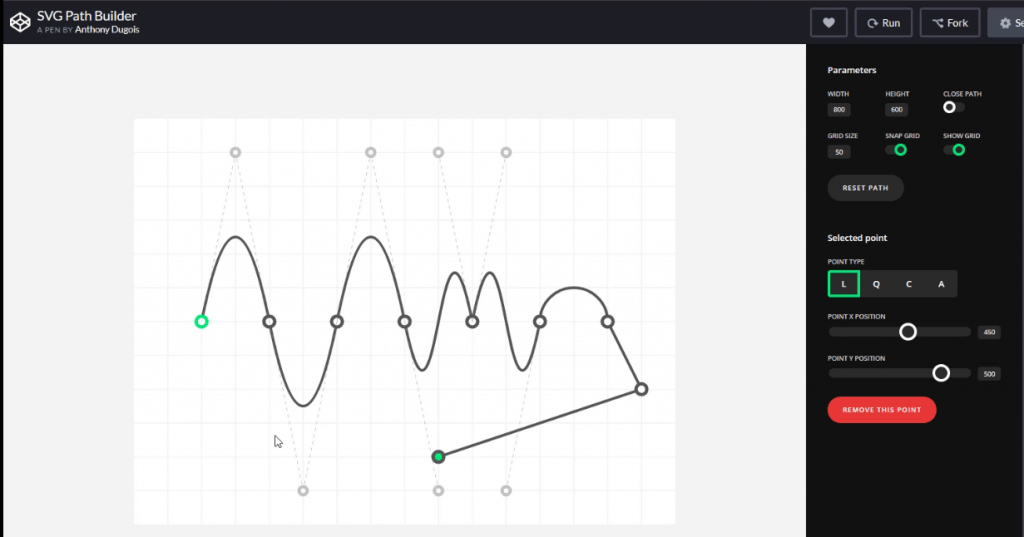
To create the shape of our div, we’ll need to use SVG path. There many ways to do this. You can draw it in illustrator and export it as code or you can use online generators. For this tutorial, we’re going to use the latter. There are many good generators out there are two that like most. First is SVG Path Builder by Anthony Dugois. If you want to create a complex shape div this is one for you. You can easily add and edit each point and the result code will be right at the bottom.
Another one is getwaves.io You can create wave shape easily using the random button. Also you can switch between curves and rectangles.
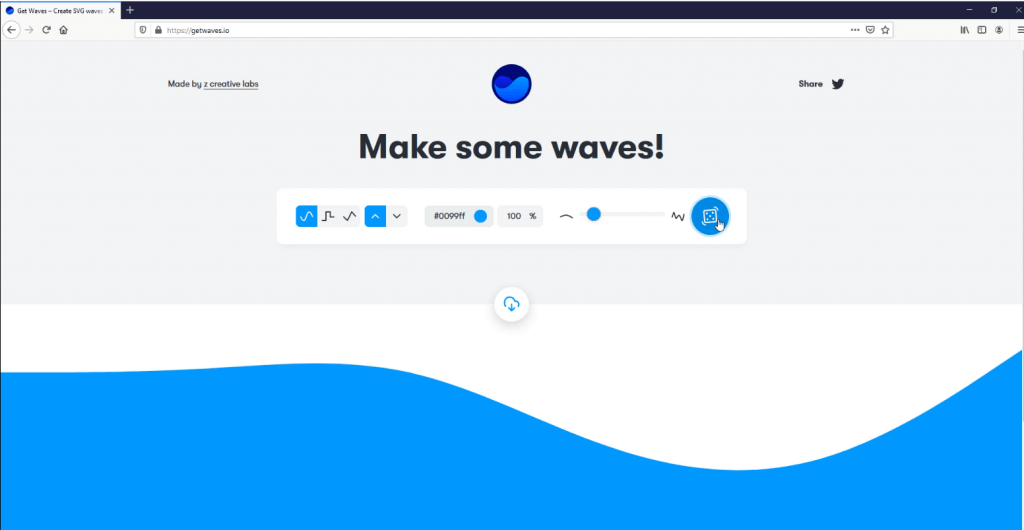
For this tutorial I’ll copy the code from getwaves.io and paste it at the end of the div. The viewbox property defines the size of the svg. Since we’re not going to set the width and height, the svg will scale to fit so we don’t have to worry about this for now. Next is fill, which is the color of our svg shape. And the last one is the most important. The “d” property defines the path of the svg.
It should be noted that The code we copied from getwaves have the entire svg structure while other generator like previous one from Anthony only have the path value and you’ll have to write the svg tag by yourself.
<div class="curved-div">
<h1>Hello World</h1>
<p>
Lorem ipsum dolor sit amet, consectetur adipiscing elit. In orci lorem, porttitor nec vulputate sit amet...
</p>
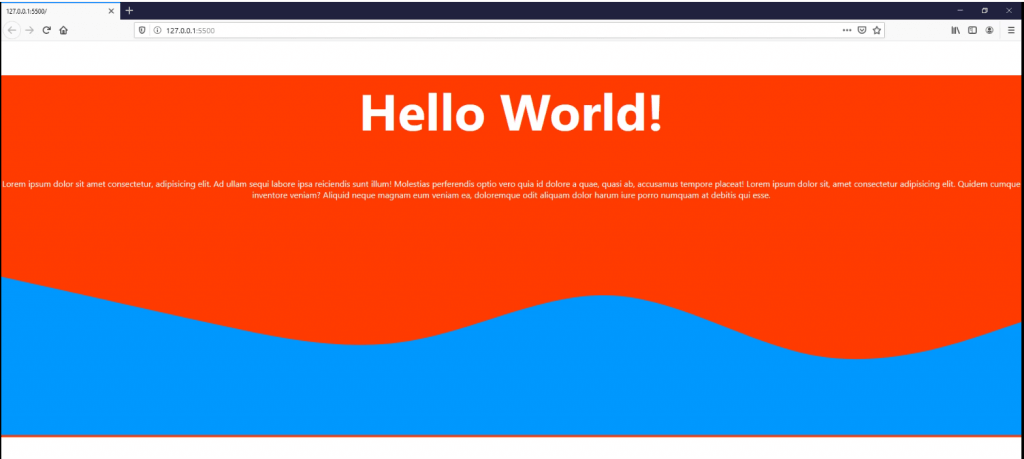
<svg viewBox="0 0 1440 319">
<path fill="#fff" fill-opacity="1" d="M0,32L48,80C96,128,192,224,288,224C384,224,480,128,576,90.7C672,53,768,75,864,96C960,117,1056,139,1152,149.3C1248,160,1344,160,1392,160L1440,160L1440,320L1392,320C1344,320,1248,320,1152,320C1056,320,960,320,864,320C768,320,672,320,576,320C480,320,384,320,288,320C192,320,96,320,48,320L0,320Z"></path>
</svg>
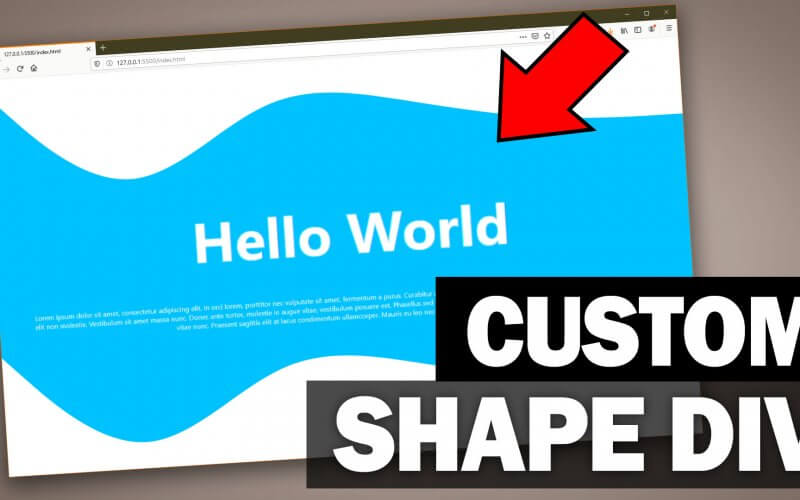
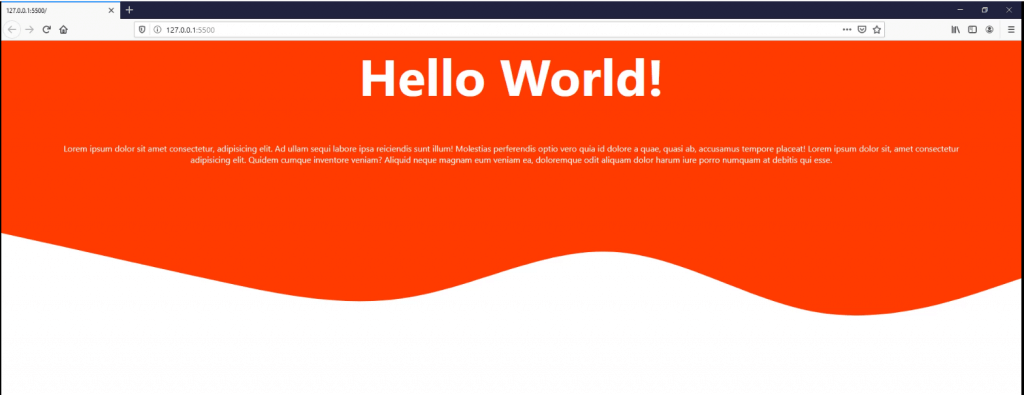
</div>And here is our div. Our svg shape currently has blue fill color. But you’ll see if we change it to white, it will look like the div has been cut to that shape.
After changed the fill color to white, I’ll also set the svg display to block to make sure it takes up the entire width.
.curved-div svg {
  display: block;
}
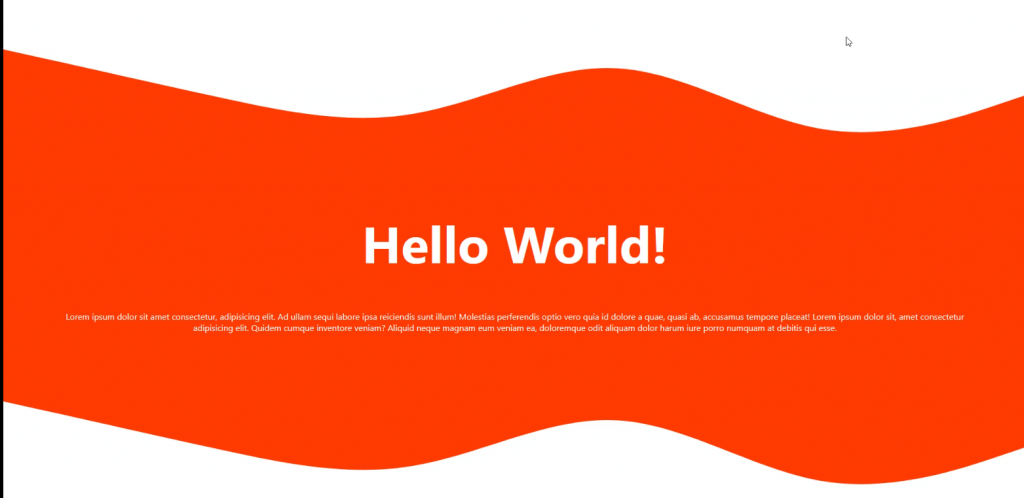
We can use same technique with the upper side of the div except this time we’ll change the svg fill color to orange while change the div background to white. The good thing about using svg is your div will scale responsively to the window size. Below is the final result.
Here is the Source Code of this tutorial – Download
