Setup Automatic Server Down Alert with Stackdriver
Hosting a website on an unmanaged server is fun. You can customize and tweak it as you’d like without having to deal with the tech support team. The catch is, you also have to take on an extra role as system administrator instead of just being a web developer. You’ll have to monitor and resolve all the incidents by yourself. Since you can’t look at the screen all the time, you’ll need an automated tool to help notifying you for urgent issues (server thrashing, internal errors, etc.)
If you host your website on Google Cloud, we can easily setup automatic server status monitoring to alert you when server is down or your website is not responsive.
What is Stackdriver
Stackdriver is monitoring and management services for Google Cloud services (VM, Application Container, etc.) For example, you can setup a Dashboard to show weekly statistic of CPU and RAM Usage, Disk Operation and Network Traffic of your VM instance. Then setup an uptime monitoring and automatic alert to send an email or SMS to your phone when server is down. The incident ticket will be generated and show up on your dashboard after the crash. You can also pull the error logs to help you research and resolve the issue.
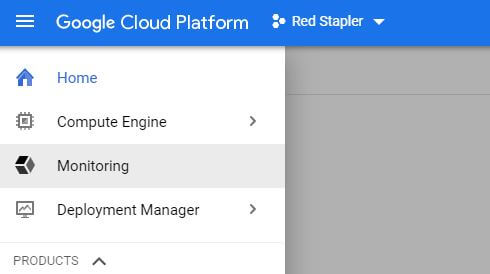
You can access Stackdriver from Monitoring Tab on your Google Cloud Console.
And that’s the gist of Stackdriver usage. There are also additional features like Debugger, Performance profiler, Bottleneck Tracer more!
Note: Some data metrics require you to install Stackdriver monitoring agent to your server first before you can view it.
Uptime Checker
Before you can setup an alert, you’ll have to setup uptime checker first. Goto “Uptime Checks” on Stackdriver left navigation bar.
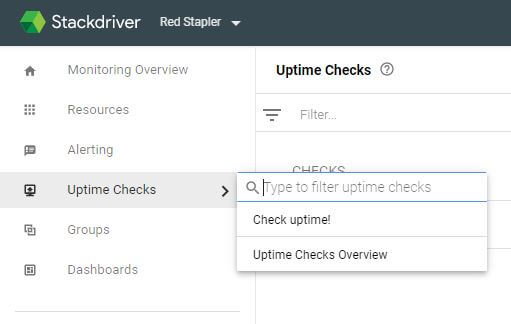
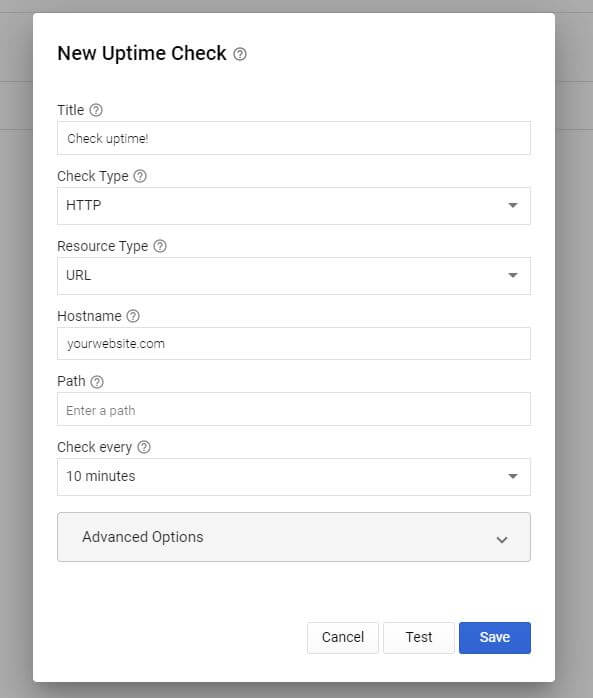
Then click “Add Uptime Check” button. You’ll get a popup to fill the information like this. Basically, just setup the name (Title) and put your website URL in Hostname.
Also I recommend to change the check interval from 1 to 10 minutes instead. Because for each status check, Google will send in 6 test requests from several locations. So if you set the check interval to 1 minutes, you’ll get 6 requests per minutes which is quite overkill and also waste some of your server resource.
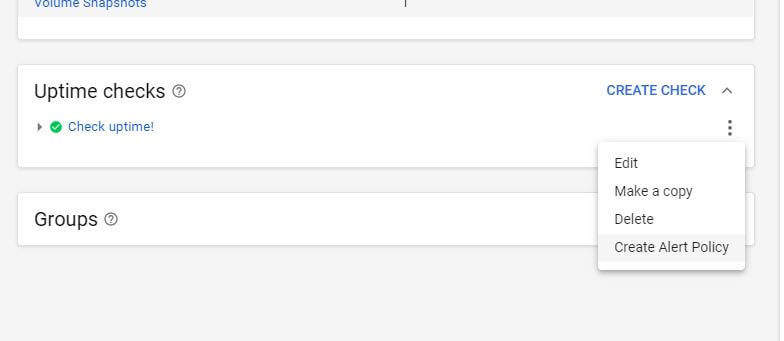
Then click Save. Now it will show up on your Monitoring Overview board like this. Next let’s setup an Alert Policy by clicking the dots after your checker and select “Create Alert Policy”
Alert Policy
You’ll get to setup the number of threshold before Stackdriver considerate it as a policy violation and send an alert to you. For me, I leave it with default setting which will send alert immediately if any single test request has failed.
The verbiage on the panel is quite confusing (well at least for me) I’d recommend you to test first before relying on it.
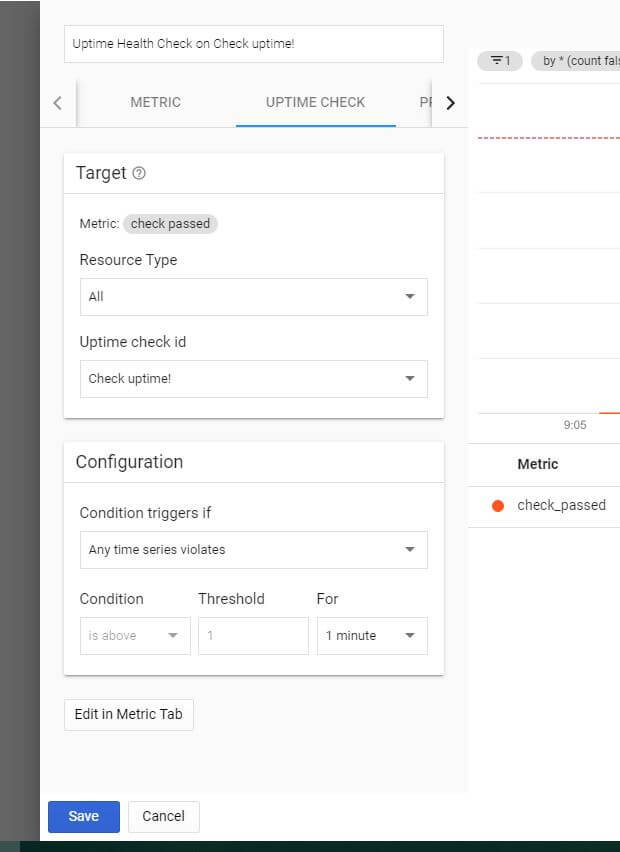
Then when you edit the policy again and head to Notification section. Here you can choose how Stackdriver should send an alert to you. The available options are Slack, Pager, SMS, Google Cloud Console App and more.

Testing
To test this, I stopped my Google Cloud VM instance for one minute and then restarted it. Combined with stopping/restarting time, the whole process created about 5 minutes downtime which is acceptable for me. With current traffic I have, this should temporarily impact around 10-20 unfortunate people who visit my website during the test (Sorry…)
The result was good. I got a server down alert email around 2 minutes after I stopped my VM.
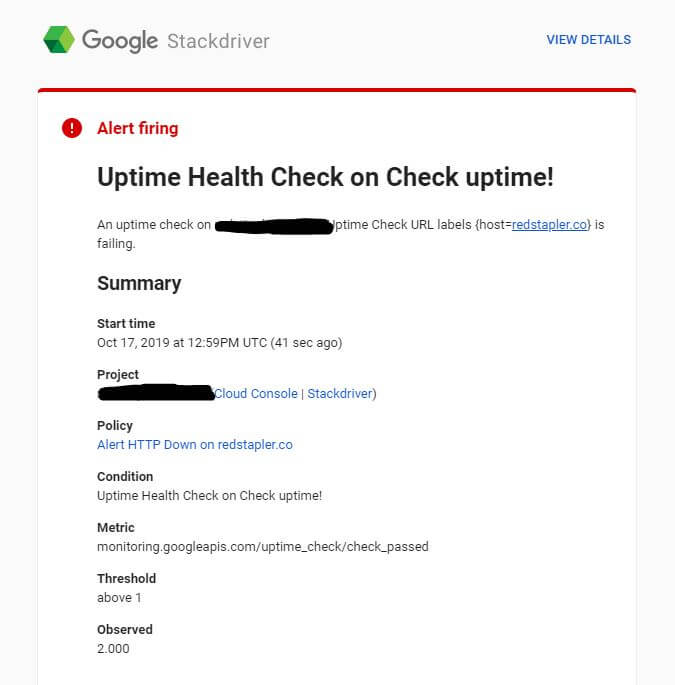
The incident showed up on Dashboard too.

And that’s all for this tutorial. Don’t forget to subscribe our Channel if you want to stay tune for more dev tips and tutorial videos!

